
Finding adhesive residue on your precision granite surface plate is always a frustrating moment. This seemingly minor issue can compromise the accuracy of your measurements, making it more than just an unsightly mess. Improper removal techniques often spread the problem, creating a larger, stickier film that attracts dust and debris.
Maintaining the pristine condition of a granite surface plate is paramount for metrology applications. Any contamination, including stubborn glue or tape residue, directly impacts the flatness and calibration standards. Knowing precisely how to remove adhesive from a granite surface plate safely and effectively is a skill every technician needs.
This guide will walk you through the correct methods, ensuring you can tackle sticky situations without damaging your valuable equipment. We will cover everything from identifying the adhesive to using safe scraping tools and preventing future occurrences, helping you keep your surface plate in top working order.
Why Adhesive Is Tricky: Smear risk and residue films
Granite surface plates are incredibly dense and non-porous, which makes them ideal for precision work. However, this smooth, hard surface also presents unique challenges when dealing with adhesive contamination. Adhesives tend to bond tenaciously to the polished granite, creating a strong attachment that resists simple wiping.
The biggest risk during removal is smearing the adhesive rather than lifting it cleanly. Many common solvents or aggressive rubbing motions can soften the glue, spreading it into a thin, almost invisible film across a larger area. This film, even if not overtly sticky, can subtly alter surface characteristics and attract airborne particles.
Such a residue film might not be immediately obvious but can significantly impact the accuracy of delicate measurements. Even a microscopic layer can create a slight elevation or alter the friction, affecting the movement of gauges and workpieces. This unseen contamination directly undermines the very purpose of a precision surface plate.
Additionally, the age of the adhesive plays a big role in how difficult it is to remove. Fresh tape residue removal is generally simpler than tackling old, dried-out label glue that has baked onto the surface over months or years. Older glues often become brittle or chemically altered, requiring a different approach.
Using improper tools or harsh chemicals can also permanently damage the granite’s finely lapped finish. Abrasive materials can scratch the surface, while strong acids or bases might etch the granite, compromising its flatness and calibration. Always prioritize methods that protect the integrity of your precision equipment.
Identify the Adhesive: Tape, label glue, or temporary fixture pads
Understanding the type of adhesive you are dealing with is the first critical step in effective removal. Different glues have distinct chemical compositions, meaning certain solvents or methods will be more effective than others. A careful assessment helps prevent unnecessary effort or potential damage to your valuable granite surface plate.
Common culprits include standard masking tape, packaging tape, double-sided tape, and various label glues, alongside more specialized temporary fixture pads. Each type leaves a unique residue that reacts differently to mechanical and chemical interventions. Knowing your enemy allows you to choose the right strategy for how to remove adhesive from a granite surface plate.
| Adhesive Type | Typical Appearance/Consistency | Suggested Initial Approach |
|---|---|---|
| Masking Tape Residue | Soft, gummy, light yellow/white film | Gentle scraping with plastic blade, then isopropyl alcohol |
| Packaging/Clear Tape | Thin, very sticky, clear or slightly hazy film | Careful peeling, then citrus-based remover or mineral spirits |
| Double-Sided Tape | Thick, very aggressive, often foam-backed | Slow, careful peeling, then targeted solvent application |
| Label Glue | Hardened, brittle, or powdery, sometimes yellowed | Soften with solvent, then plastic blade or microfiber cloth |
| Fixture Pad Adhesive | Strong, rubbery, often dark grey or black | Warm application (if safe), then specialized adhesive remover |
Observing the color, texture, and stickiness of the residue provides valuable clues. A soft, gummy residue suggests a different approach than a hard, brittle one. This identification process saves time and reduces the risk of ineffective or harmful treatments, ensuring a cleaner outcome for your granite surface.
Sometimes the adhesive’s original purpose, like a temporary holding fixture, can also tell you about its strength and composition. Heavy-duty fixture adhesives are designed for strong bonds, so they will require more robust, yet still safe, removal techniques. Always consider the source of the sticky mess before attempting removal.
Tools That Are Safe: Plastic blades, wipes, and controlled applicators
Choosing the right tools is just as important as selecting the correct solvent when you need to remove adhesive from a granite surface plate. Using anything abrasive or metallic can instantly damage the precision-lapped surface, leading to costly repairs or even replacement. Safe scraping tools are your first line of defense against scratching.
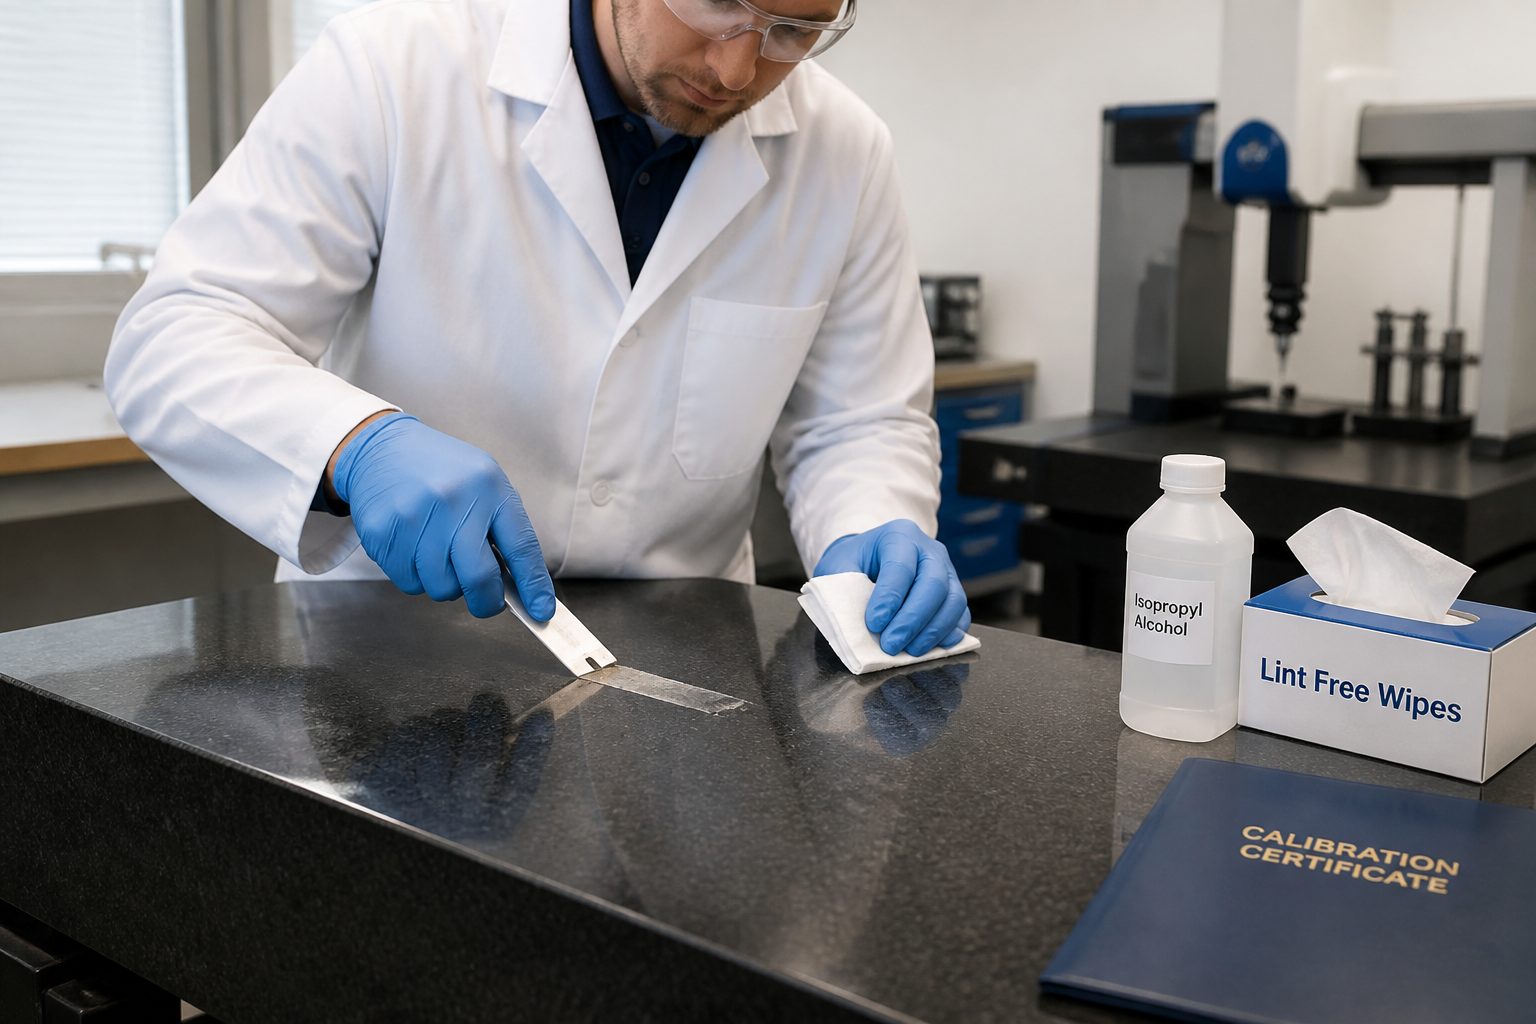
Plastic razor blades are indispensable for this task, offering the perfect balance of rigidity for scraping and softness to prevent marring. These specialized blades can effectively lift softened adhesive without posing a risk to the granite itself. Always hold the blade at a shallow angle, almost parallel to the surface, to maximize effectiveness and minimize pressure.
For applying solvents and wiping away residue, high-quality microfiber cloths or lint-free wipes are essential. These materials absorb liquids efficiently and release residue without leaving behind fibers or streaks. Avoid using paper towels or rags that can shed lint, as these only add more contaminants to your clean surface.
Controlled applicators, such as cotton swabs, cotton balls, or small droppers, allow for precise application of solvents. This precision helps contain the solvent to the adhesive area, preventing it from spreading to clean parts of the granite or evaporating too quickly. You want to target the glue, not drench the entire plate.
Always wear appropriate chemical-resistant gloves to protect your hands from solvents and adhesives. Good ventilation is also a priority, especially when working with volatile organic compounds. Safety should always be a primary concern during any cleaning or maintenance task.
Step-by-Step Removal Process That Minimizes Spread
A systematic approach is key to successfully remove adhesive from a granite surface plate without creating a bigger mess. Haphazard scrubbing or excessive solvent use often makes the problem worse, spreading sticky residue across a wider area. Follow these steps for efficient and contained cleanup.
First, prepare your workspace by ensuring good lighting and ventilation, and gather all your safe scraping tools and appropriate solvents. Lightly dust the entire surface plate to prevent any loose particles from embedding into the softened adhesive. This initial preparation sets the stage for a cleaner operation.
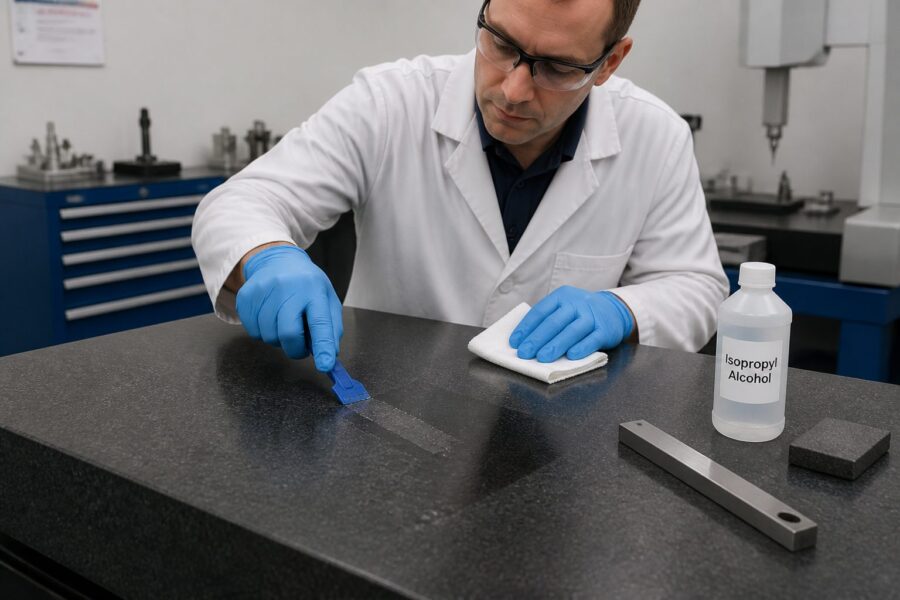
Begin by attempting gentle mechanical removal using a plastic razor blade. Hold the blade at a very low angle, almost flat against the granite, and push gently to lift any thick or pliable adhesive. Work slowly and methodically, scraping in one direction to avoid tearing or scattering the residue.
Next, apply a small amount of your chosen solvent directly onto the remaining adhesive using a cotton swab or controlled dropper. Allow the solvent to sit for a short period, typically 30 seconds to a minute, to soften the glue without letting it dry or spread excessively. This dwell time is crucial for breaking down the adhesive’s bond.
After the adhesive has softened, gently scrape it away with your plastic blade or wipe it with a clean, lint-free cloth. Always wipe towards the center of the residue patch to contain it, then immediately discard the soiled cloth or clean the blade. Repeat this application and removal process in small, manageable sections until the bulk of the adhesive is gone, always using fresh cleaning materials to prevent re-depositing the glue.
Lifting vs Dissolving: Choosing the right approach
Deciding whether to lift the adhesive mechanically or dissolve it with a solvent depends on the type, age, and quantity of the residue. Both approaches have their merits, and sometimes a combination of the two yields the best results. Understanding when to use which method is crucial for effective tape residue removal.
Lifting is generally preferred for fresh, thick, or rubbery adhesives that haven’t fully cured or become brittle. This method involves carefully peeling or scraping the adhesive off the surface in larger pieces. Dissolving, conversely, is ideal for older, thinner, or very stubborn residues where mechanical lifting would only smear or break the glue into tiny fragments.
- Lifting: Best for fresh, pliable tape or sticker residue.
- Lifting: Minimizes solvent use, reducing potential for chemical exposure.
- Lifting: Requires careful, consistent pressure with a safe plastic blade.
- Dissolving: Necessary for hardened, baked-on label glue on granite.
- Dissolving: Breaks down adhesive polymers, making them easier to wipe away.
- Dissolving: Involves controlled application of appropriate solvents.
- Dissolving: Essential for removing the invisible film left after initial lifting.
When lifting, the goal is to remove as much material as possible in one go, leaving minimal residue behind. This often reduces the amount of solvent needed for the final cleanup phase. Always work slowly and deliberately to avoid tearing the adhesive and leaving more small pieces.
For dissolving, selecting the right solvent is paramount; common choices include isopropyl alcohol, mineral spirits, or specialized citrus-based adhesive removers. Test a small, inconspicuous area first to ensure compatibility, although granite is generally quite resistant to these common solvents. The right solvent will break down the glue’s bond with the granite, allowing for easy wiping.
Cleaning Up the “Invisible” Film After the Adhesive Is Gone
Even after all visible adhesive residue has been removed, a subtle, often invisible, film can remain on the granite surface. This film might feel slightly tacky or just look a little duller than the surrounding pristine granite. It is a common oversight that can still affect the accuracy and cleanliness of your metrology equipment.
Detecting this invisible film often requires good lighting and a keen eye, or a simple touch test. Run a clean, dry fingertip over the area; if it feels different from the untouched granite, a film is present. Sometimes, breathing lightly on the surface will reveal a faint haze where the residue lingers.
To eliminate this film, a final cleaning step with a suitable solvent is absolutely essential. Isopropyl alcohol (IPA) is an excellent choice because it is highly evaporative and leaves virtually no residue itself. Apply IPA to a fresh, lint-free microfiber cloth and wipe the affected area thoroughly, using a clean section of the cloth for each pass.
For tougher films, or if IPA doesn’t fully cut it, a specialized granite cleaner designed for precision surfaces can be effective. These cleaners are formulated to remove oils and residues without harming the granite’s finish. Always follow the manufacturer’s instructions for any commercial cleaning product you use.
After using any solvent, a final wipe down with a cloth lightly dampened with distilled water can help remove any remaining chemical traces. Immediately follow this with a dry, lint-free cloth to ensure the surface is completely dry and streak-free. This meticulous cleaning ensures the granite surface plate is truly free of all contaminants and ready for precision work.
Checking for Raised Spots and sticky edges
Once you believe you have successfully removed all the adhesive and cleaned the area, a critical inspection is necessary. Precision metrology demands absolute flatness and a perfectly clean surface, so any lingering raised spots or sticky edges could compromise your measurements. This final check is not something to rush.
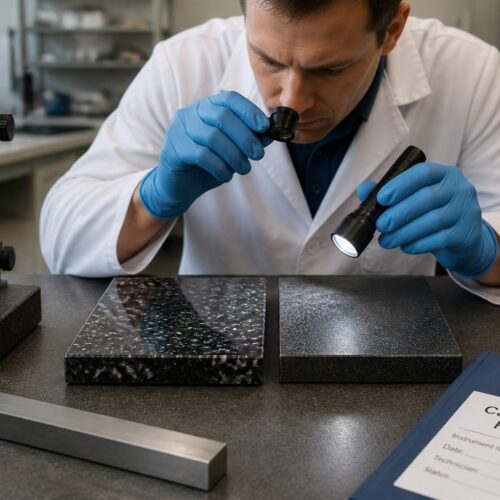
Start with a visual inspection under bright, angled light. Look for any faint discoloration, dullness, or textural differences that might indicate residual adhesive or film. Sometimes, a slight sheen or shadow will appear where the glue once was, even if it feels clean to the touch.
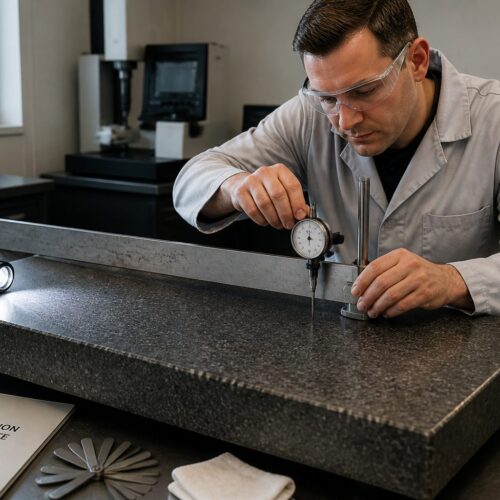
For detecting minute raised spots or irregularities, use a precision straightedge. Place the straightedge across the cleaned area and gently rock it, checking for any gaps or movement that shouldn’t be there. You can also carefully slide a feeler gauge under the straightedge if you suspect even the slightest deviation in flatness.
A simple yet effective test for stickiness is the “squeak test.” With a clean, dry fingertip, lightly drag it across the cleaned area; if it makes a slight squeaking sound or feels perfectly smooth, you’re likely in the clear. Any lingering drag or subtle tackiness means more cleaning is required to completely remove adhesive from a granite surface plate.
If small, stubborn spots persist, repeat the localized solvent application and gentle scraping process. Focus only on the problematic areas, using minimal solvent and fresh cleaning materials each time. Your goal is a surface that is indistinguishable from the untouched granite, ensuring your metrology standards remain uncompromised.
Preventing Repeat Issues: Better labeling and marking habits
The best way to deal with adhesive residue is to prevent it from happening in the first place. Establishing smart labeling and marking habits can drastically reduce the frequency of needing to remove adhesive from a granite surface plate. Proactive measures save time, effort, and protect your valuable equipment.
Whenever possible, avoid applying adhesive materials directly onto the granite surface plate itself. Instead, consider using auxiliary surfaces, dedicated marking areas, or temporary fixtures that do not require direct adhesion to the precision surface. This simple rule eliminates the source of most sticky problems.
If you absolutely must use tape or labels for temporary fixturing or identification, opt for low-tack varieties. Masking tape designed for delicate surfaces or painter’s tape often leaves less residue than standard packaging or office tapes. Static cling labels are another excellent option, as they adhere without any glue whatsoever.
Make it a strict policy to remove any temporary adhesive materials immediately after their purpose is served. The longer tape or labels remain on the granite, the more likely the adhesive is to cure, dry out, or break down, making tape residue removal much more difficult. Prompt action is always better.
For shared surface plates, establish clear protocols and communicate them to all users. A simple sign reminding staff of proper labeling practices and immediate cleanup can go a long way in preventing recurring issues. Foster a culture of care and responsibility among everyone who uses the precision equipment.
What to Do If Adhesive Hardened or Mixed With Dust
Sometimes, adhesive residue isn’t discovered until it has hardened, become brittle, or even mixed with airborne dust and debris. This scenario presents a more challenging cleanup, as the embedded particles and solidified glue are far tougher to remove than fresh, pliable residue. This is where patience and a slightly different strategy come into play when you need to remove adhesive from a granite surface plate.
For hardened adhesive, your primary goal is to re-soften it without causing it to smear or dissolve excessively. Apply your chosen solvent sparingly but allow for a longer dwell time than usual, perhaps several minutes, to give it time to penetrate and break down the hardened bond. You might need to reapply solvent multiple times.
Once softened, use your safe scraping tools—plastic razor blades—with extreme caution. Instead of broad strokes, try to gently chip away at the softened edges, lifting small pieces at a time. The goal is to separate the adhesive from the granite without applying so much force that you risk scratching the surface with embedded dust.
If the adhesive is deeply mixed with dust, creating a gritty, abrasive layer, consider using a poultice method if the solvent allows. This involves applying a thick layer of solvent-soaked cotton or a paste-like cleaner over the area, covering it to prevent evaporation. This can draw the contaminants out of the granite’s microscopic pores, though it’s less common for surface adhesive. Always verify the poultice material is safe for granite.
In severe cases where the adhesive has caused pitting, deep staining, or has become inextricably bonded and abrasive, professional intervention might be necessary. A metrology specialist can assess the damage and, if feasible, perform re-lapping or re-calibration to restore the surface plate’s precision. This should always be a last resort, as it is a costly and time-consuming process.
Documenting incidents for shared plates
For organizations utilizing shared granite surface plates, documenting incidents of adhesive contamination is more than just good practice; it’s a vital part of maintaining equipment integrity and accountability. A consistent record helps identify recurring problems, problematic materials, or areas needing more user training. This practice fosters a more responsible environment.
Establish a simple logbook or digital record where users can note any adhesive found on a plate. This record should include the date, the type of adhesive observed (if known), its location on the plate, and the method used for tape residue removal. Including the name of the person who cleaned it can also be helpful for follow-up.
This documentation serves several important purposes beyond just tracking incidents. It can highlight if certain types of tape or label glue are particularly difficult to remove, prompting a review of approved materials. It also helps identify if specific users or departments are consistently leaving residue, indicating a need for targeted education.
Over time, these records provide valuable data for equipment managers, allowing them to make informed decisions about maintenance schedules and training programs. They can pinpoint patterns of wear or contamination that might otherwise go unnoticed. This data contributes to the longevity and reliability of your precision metrology tools.
Promoting a culture where documenting these issues is seen as a helpful contribution, rather than a punitive measure, is essential. Encourage users to report and log any adhesive finds, even if they successfully clean it themselves. This collaborative approach ensures everyone plays a part in preserving the accuracy of shared granite surface plates.
Conclusion
Maintaining the pristine condition of a granite surface plate is fundamental to accurate metrology. Adhesive residue, though a common nuisance, demands careful and precise removal to avoid compromising the plate’s critical flatness and finish. Knowing how to remove adhesive from a granite surface plate effectively protects your investment and ensures reliable measurements.
The right approach involves correctly identifying the adhesive, utilizing safe scraping tools like plastic blades, and employing controlled solvent application. Always prioritize methods that lift or dissolve the glue without smearing it across the surface or causing any damage to the granite itself. Patience and meticulousness are your greatest allies in this task.
Remember to always check for invisible films and sticky edges after the visible residue is gone. A final, thorough cleaning ensures the surface is truly free of contaminants, ready for the most demanding precision work. Overlooking these subtle signs can lead to inaccurate readings and ongoing frustration.
Beyond cleanup, prevention through better labeling habits and clear communication within shared workspaces is key. Opt for low-tack alternatives and remove temporary adhesives promptly. These simple habits drastically reduce the likelihood of future sticky situations.
Ultimately, the integrity of your granite surface plate directly impacts the quality of your work. By following these guidelines, you can confidently tackle adhesive residue, maintaining the high standards your metrology operations demand. Your commitment to careful maintenance ensures your precision equipment continues to perform flawlessly.