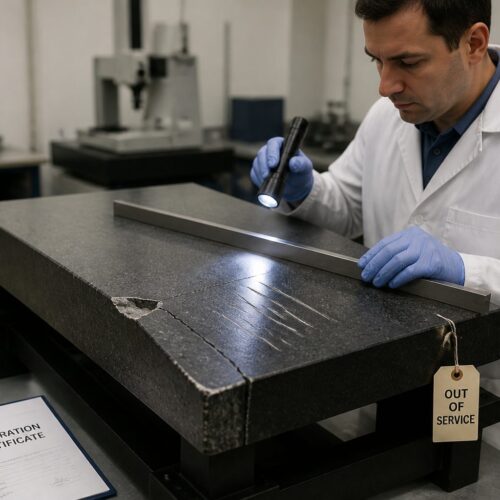
Ensuring the accuracy of your measurements starts with a stable foundation, and for precision metrology, that means a properly supported granite surface plate. Many technicians understand the importance of a surface plate’s flatness, but fewer realize that how you support and level it plays an equally critical role in maintaining that accuracy. A poorly leveled plate can introduce subtle distortions, leading to inconsistent readings and wasted time.
Learning how to level a granite surface plate correctly is a fundamental skill for anyone working in a metrology lab or precision manufacturing environment. This guide will walk you through the essential steps, tools, and considerations for achieving optimal stability and repeatable results. We’ll cover everything from preparing your workspace to making precise adjustments with surface plate leveling screws.
Proper surface plate care and setup are not just about meeting specifications; they are about building confidence in every measurement you take. By following these guidelines, you will enhance the reliability of your metrology processes and extend the life of your valuable granite calibration standards. Let’s make sure your measurements stand on solid ground.
Leveling vs flatness: what each one means for your work
It’s common for people to confuse leveling with flatness, but these two concepts describe very different aspects of a granite surface plate. Flatness refers to the inherent geometric accuracy of the plate’s top surface itself, typically measured in microinches or micrometers over its entire area. Manufacturers precision-grind and lap granite surface plates to meet strict national or international standards for flatness, such as federal specification GGG-P-463c.
Leveling, on the other hand, deals with the orientation of the surface plate relative to the Earth’s gravitational plane. It ensures the plate is horizontally balanced, preventing any gravitational sag or twist from affecting its calibrated flatness. A perfectly flat plate that is not level can still introduce measurement errors, especially when using instruments sensitive to gravity or fluid levels.
Think of it this way: flatness is about the internal quality of the plate, while leveling is about its external setup. Even the most precisely ground surface plate will perform poorly if it’s sitting crooked on its stand. This is why understanding how to level a granite surface plate is so important for accurate work.
The granite itself offers incredible stability and vibration damping, but it is still subject to the forces of gravity. Proper leveling ensures that these forces are distributed evenly across the plate’s designated support points. Incorrect leveling can induce stress, potentially causing the plate to deform slightly from its calibrated flatness specification.
Maintaining both flatness and level is essential for repeatable and reliable measurements in any metrology application. You can’t have one without the other for true precision. When you properly level the plate, you create the ideal environment for its inherent flatness to perform as intended.
Any precision measurement instrument, from height gauges to electronic levels, relies on a stable, level, and flat reference. Ignoring the leveling aspect can lead to cumulative errors that are difficult to diagnose later. Therefore, mastering the process of how to level a granite surface plate is a foundational step in quality control.
When you should level the plate (and when you shouldn’t)
Knowing when to adjust your granite surface plate is as important as knowing how to level a granite surface plate itself. You should always level a new surface plate immediately after installation to establish its initial stable position. Any time the plate is moved, even slightly, a full re-leveling procedure is necessary to restore its accuracy.
Regular periodic checks are also crucial, especially in facilities with heavy machinery, fluctuating temperatures, or high foot traffic, as these factors can cause subtle shifts over time. However, resist the urge to constantly tinker with the leveling screws unless a significant change has occurred. Over-adjusting can introduce more problems than it solves.
| Condition | Action Required | Reason |
|---|---|---|
| New installation | Full Leveling | Establish initial stability and ensure calibrated flatness. |
| Plate moved | Full Leveling | Any relocation shifts support points and introduces twist. |
| Annual calibration | Leveling Check/Adjust | Verify continued stability and compensate for floor settling. |
| Noticeable vibration | Leveling Check/Adjust | Vibrations can cause feet to shift or floor to settle unevenly. |
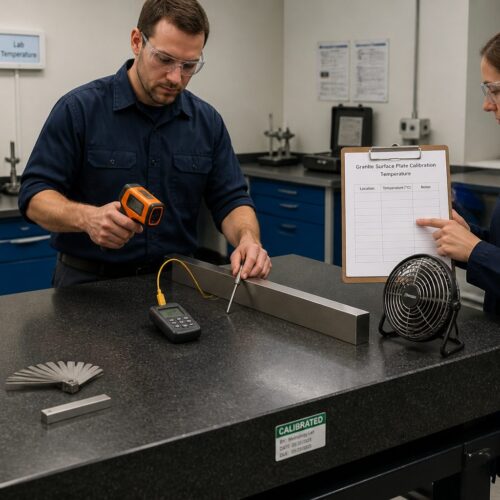
| Temperature fluctuations | Leveling Check | Extreme changes can affect stand or floor stability. |
| No apparent issues | No Adjustment | Avoid unnecessary adjustments that can induce stress. |
Tools you need: levels, shims, and basic accessories
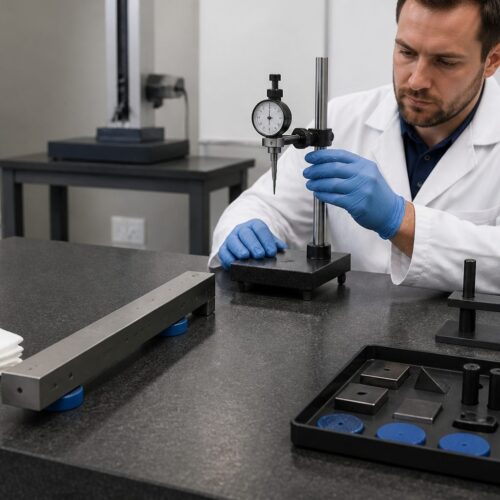
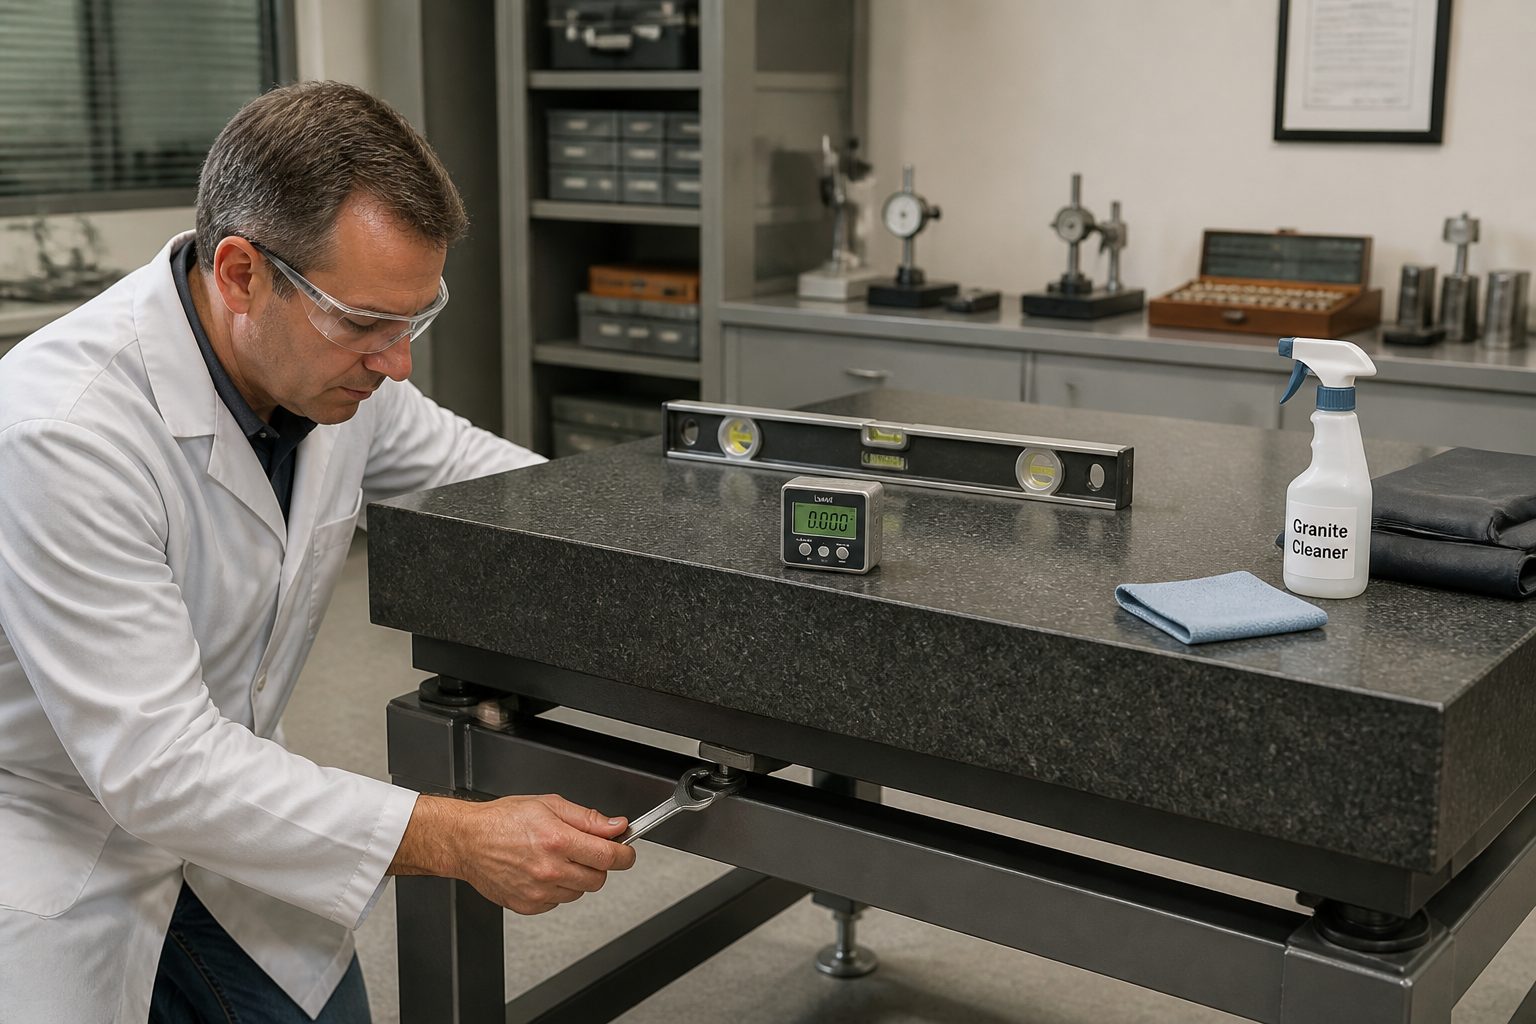
To accurately learn how to level a granite surface plate, you need the right set of tools. The most critical item is a high-precision level, usually an electronic level or a sensitive spirit level with divisions of 0.0001 inch per 10 inches or finer. These precision instruments provide the feedback necessary for minute adjustments.
You will also need a set of non-magnetic shims, preferably made from stainless steel, in various thicknesses. These shims are essential for fine-tuning the height under the surface plate leveling screws or the stand’s feet. Having a range of thicknesses allows for precise adjustments without over-tightening the screws.
A clean, soft cloth and a suitable granite cleaner are necessary for preparing the surface plate before any measurements or adjustments. Dust and debris can interfere with accurate level readings and potentially scratch the precision surface. Always ensure the plate is spotless before beginning any work.
A torque wrench can be useful for tightening the surface plate leveling screws to a consistent specification if recommended by the manufacturer. This prevents over-tightening, which can induce stress into the granite. While not strictly mandatory for every leveling procedure, it promotes uniformity and prevents damage.
You might also consider a stable, non-magnetic straightedge or parallel if your precision level is short. This allows you to bridge longer distances on the plate, providing a larger reference base for your level. Always ensure any accessory tools are clean and free of burrs.
Finally, a small notebook and pen are invaluable for documenting your adjustments and readings, especially when learning how to level a granite surface plate. Keeping a record helps track progress, identify patterns, and ensure repeatability for future leveling tasks. This systematic approach saves time and improves accuracy over the long term.
Checking the stand: feet condition and floor contact
Before you even begin to consider how to level a granite surface plate, you must thoroughly inspect its supporting stand. The condition of the stand’s feet and their contact with the floor are foundational to achieving a stable setup. Any issues here will compromise all subsequent leveling efforts.
Examine each stand foot for damage, wear, or trapped debris. Worn or uneven feet cannot provide consistent support, and even a tiny pebble lodged under one foot can create an unstable pivot point. Clean all feet thoroughly to ensure they make full and even contact with the floor surface.
The floor itself plays a significant role in the overall stability of your surface plate. Ideally, the plate should rest on a solid, reinforced concrete floor, isolated from heavy machinery or high-traffic areas. Check for cracks, unevenness, or soft spots in the floor directly beneath the stand’s footprint.
Ensure that all surface plate leveling screws or pads on the stand are making firm, positive contact with the floor. If the stand has adjustable feet, confirm they are not loose or wobbly. A stable stand is the prerequisite for a truly level surface plate.
For larger surface plates, some stands incorporate a three point support system, which is inherently stable on uneven floors. Verify that this three point support is correctly engaged and distributing the plate’s weight evenly. A stand with more than three points will require careful shimming to prevent rocking.
Any issues with the stand or floor must be addressed before proceeding with the actual leveling of the granite surface. Ignoring these initial checks will lead to frustration and inaccurate results, making the effort of learning how to level a granite surface plate completely ineffective. A solid base is non-negotiable for precision.
Step-by-step leveling using a simple pattern
Once your stand is stable and the plate is clean, you are ready to learn how to level a granite surface plate using a systematic approach. The most common and effective method involves a simple three point support pattern, where adjustments at specific points influence the entire surface. This minimizes twisting and provides predictable results.
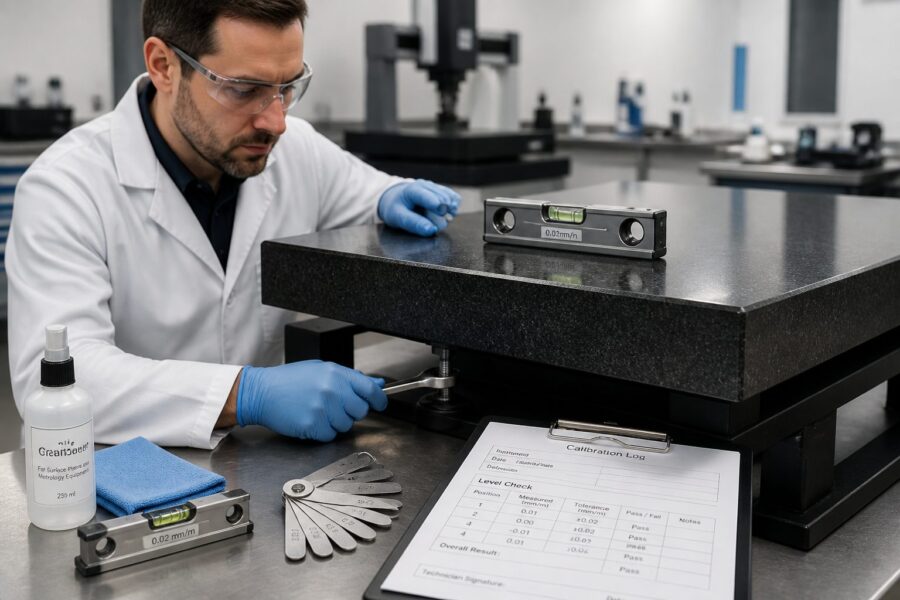
Place your precision level at the center of the plate and record the reading, establishing a baseline. Then, move the level to various points, typically near the support points or corners, making small, incremental adjustments to the surface plate leveling screws. Patience is key during this process to avoid overshooting your target.
- Identify the three primary support points (or leveling screws).
- Place the precision level over the first support point.
- Adjust the corresponding surface plate leveling screw until the level reads zero.
- Move the level to the second support point.
- Adjust that screw until the level reads zero.
- Move the level to the third support point.
- Adjust that screw until the level reads zero.
- Re-check all three points to ensure consistency.
- Move the level across diagonals and edges to confirm overall levelness.
Avoiding twist: how over-adjustment creates problems
A common pitfall when attempting to learn how to level a granite surface plate is over-adjustment, which can induce twist into the plate. Granite, while extremely rigid, is not infinitely stiff and can subtly deform under uneven stresses. Over-tightening or unevenly adjusting surface plate leveling screws can apply localized pressure that distorts the plate’s inherent flatness.
Twist manifests as a subtle, non-uniform deformation across the surface, meaning one corner might be high while the opposite corner is low, even if individual points appear level. This condition is far more detrimental to precision measurements than a simple tilt, which can often be compensated for by certain instruments. Twist introduces complex, unpredictable errors.
To avoid twist, always make small, incremental adjustments to your surface plate leveling screws. Think of it like tuning a guitar string: you make a tiny turn, check the pitch, and repeat. Drastic turns can easily throw the entire system out of whack and create unwanted stresses within the granite structure.
When working with a three point support system, remember that each adjustment affects the other two points. It’s an iterative process, not a linear one. Adjust one screw, then re-check the others to see how the change propagated across the plate, and then make further minute corrections.
Resist the temptation to force a screw if it feels tight; this is a clear sign you are inducing excessive stress. Instead, back off slightly and adjust an adjacent screw, or use shims under the feet if the stand adjustment mechanism is at its limit. Gentle, balanced adjustments are always the goal.
Regularly moving your precision level to different points and along diagonals helps you detect twist early. If you find that one area is level but another is consistently off, it’s a strong indicator of induced twist, requiring a more careful, distributed adjustment strategy. Patience and a light touch are your best allies in maintaining flatness while learning how to level a granite surface plate.
Dealing with uneven floors and vibration sources
Even the most diligent effort to learn how to level a granite surface plate can be undermined by an unstable environment. Uneven floors and persistent vibration sources are common challenges in many industrial settings. Addressing these issues proactively is essential for maintaining metrology-grade accuracy.