
Ensuring your granite surface plate delivers truly accurate measurements starts long before you place a part on its surface. The foundation of precise metrology lies in a properly installed and leveled stand. If your surface plate isn’t sitting correctly, even the most expensive inspection equipment can give you unreliable results.
Many people overlook the importance of proper surface plate leveling, assuming the plate itself handles all the precision. However, a granite surface plate, for all its rigidity, can flex and distort if its support points are not adjusted correctly. This distortion directly impacts the flatness of the working surface, which is something you definitely want to avoid.
This guide will walk you through exactly how to level a granite surface plate stand, ensuring your measurement setup is stable, repeatable, and ready for critical work. We will cover everything from understanding the difference between level and flat to the step-by-step process of stand adjustment. Getting this right is a fundamental step in maintaining the integrity of your metrology operations.
Level vs Flat: What Leveling Actually Helps With
It is important to understand that “level” and “flat” are two distinct concepts in metrology, though both are critical for a surface plate. A surface plate’s primary function is to provide a reference plane that is as flat as possible, regardless of its orientation relative to gravity. The manufacturer guarantees the flatness of the plate itself, typically to a grade like AA, A, or B.
Leveling the stand, on the other hand, refers to orienting the surface plate so its working surface is perfectly horizontal. While the plate’s inherent flatness is maintained by its construction, leveling helps prevent deflection and distortion caused by gravity. An unleveled plate, especially a larger one, can sag or twist under its own weight, compromising its certified flatness.
When you correctly level a granite surface plate stand, you are distributing the plate’s immense weight evenly across its designated support points. This uniform support minimizes any gravitational stresses that could introduce errors into your measurements. It is a preventative measure against subtle but significant inaccuracies.
Beyond preventing physical distortion, a level surface plate is often necessary for certain types of measurements. Tools like spirit levels, inclinometers, or even some CMMs rely on a truly horizontal reference for accurate operation. Trying to use these tools on an unlevel surface plate can lead to systematic errors that are hard to diagnose later.
Think of it this way: your surface plate is designed to be flat when supported correctly. Leveling the stand ensures that “supported correctly” condition is met, allowing the plate to perform as intended. This practice directly contributes to the overall stability and reliability of your metrology setup.
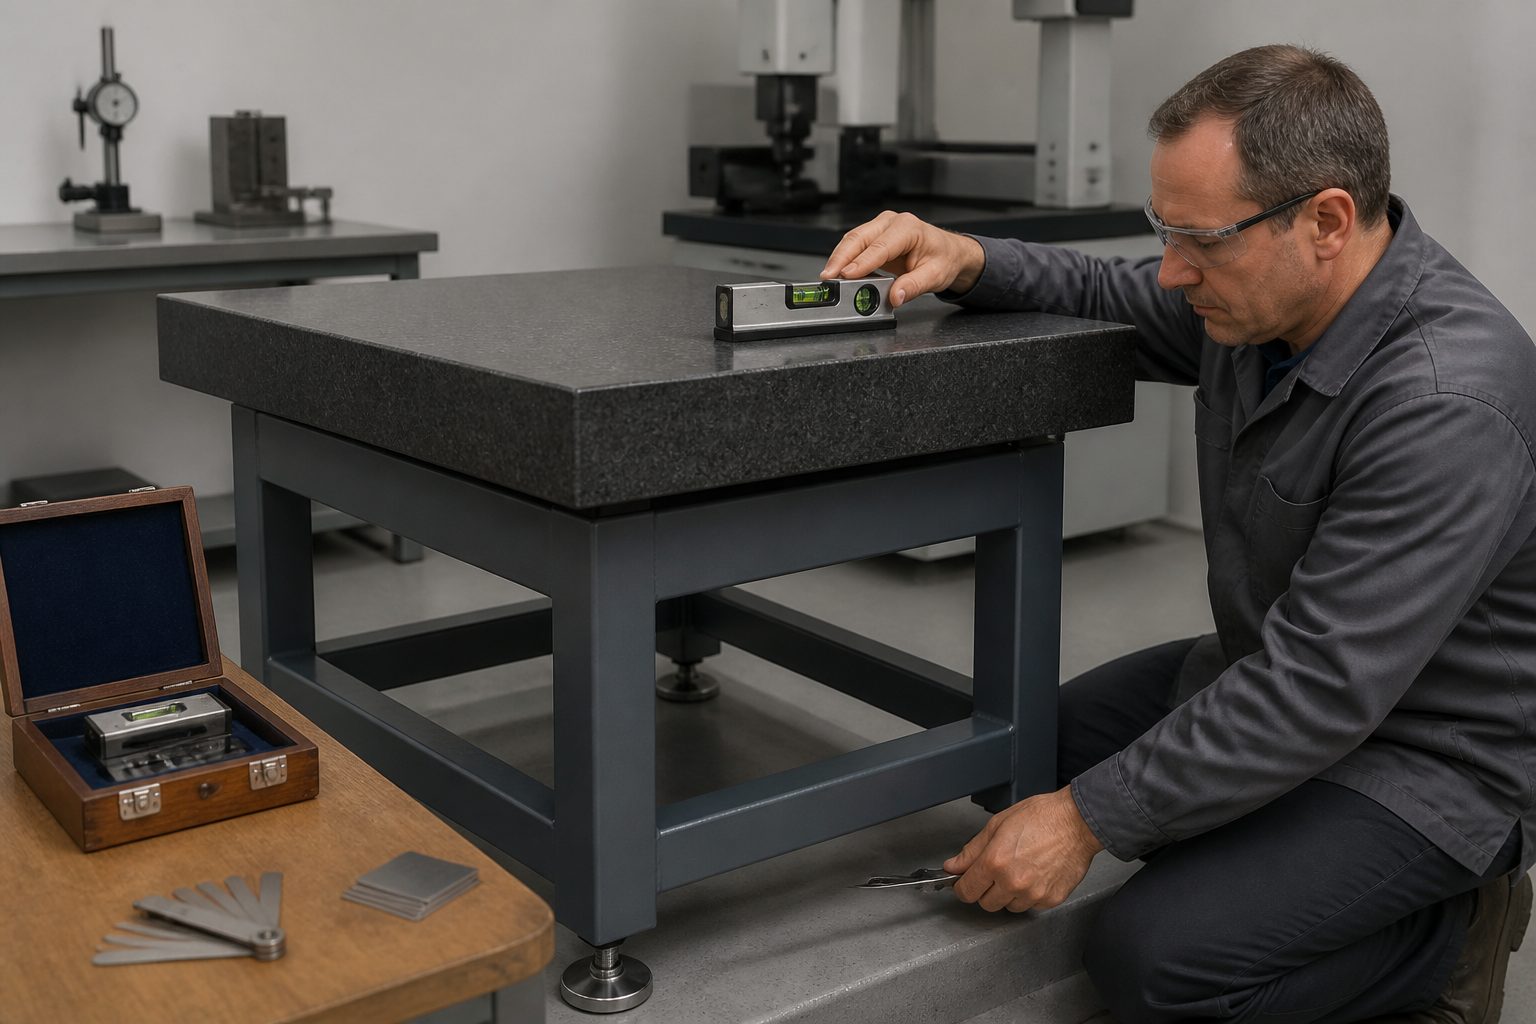
Ultimately, a proper stand adjustment procedure protects your investment in the surface plate and ensures the integrity of every measurement you take. It is a fundamental step that contributes directly to the precision and repeatability of your entire inspection process. Neglecting this step often leads to frustrating and inconsistent results.
Stand Types and What to Check Before Adjusting Anything
Surface plate stands come in various designs, each with its own advantages and considerations for leveling. The most common types are rigid steel stands, often with adjustable feet, and more specialized stands designed for vibration isolation. Understanding your stand type is the first step in successful surface plate leveling.
Before you begin any stand adjustment, always perform a thorough visual inspection of the entire setup. Check for any obvious damage to the stand, loose bolts, or obstructions underneath the plate. Make sure the floor area around the stand is clear and clean, as debris can interfere with proper foot contact.
| Stand Type | Key Features | Pre-Adjustment Checks |
|---|---|---|
| Rigid Steel Stand | Welded frame, adjustable leveling feet (often threaded rods) | Inspect welds, check foot integrity, ensure clean contact with floor, verify all bolts are tight. |
| Vibration Isolation Stand | Air springs, rubber isolators, or mechanical dampeners | Check air pressure (if applicable), inspect isolator condition, confirm no direct metal-to-metal contact bypassing isolation. |
| Heavy-Duty Workstation | Integrated storage, often caster wheels with locking mechanisms | Ensure casters are fully locked, verify the stand is not rocking on its wheels, check for structural integrity. |
| Custom Fabrication | Unique designs, often built for specific plate sizes or environments | Review design specifications, confirm material integrity, check all connection points and adjustable elements for function. |
Examine the adjustable feet themselves; they should turn smoothly and be free of rust or seized threads. A seized foot will make accurate leveling impossible and could damage the stand. Lubricate any stiff threads before attempting to make major adjustments.
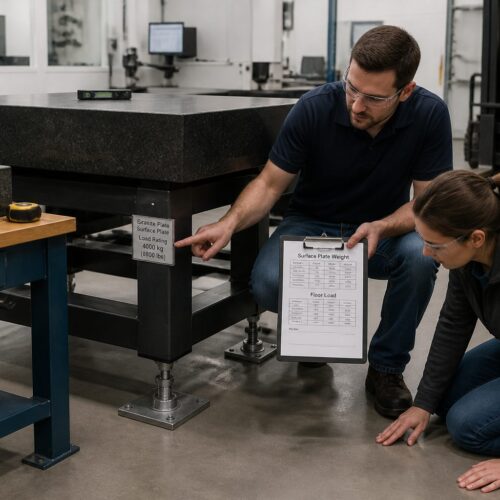
Also, confirm that the surface plate is properly seated on its designated support points on the stand. These are typically three or more pads or points designed to bear the plate’s weight without introducing undue stress. Misalignment here can cause internal stresses in the granite, leading to warpage.
Finally, consider the environment where the plate is located. Temperature fluctuations, nearby heavy machinery, or even foot traffic can affect stability and require more frequent re-leveling. A stable environment is just as important as a well-adjusted stand for consistent metrology.
Tools You’ll Need: Levels, shims, and basic hand tools
Having the right tools on hand makes the surface plate leveling process much smoother and more accurate. Do not try to rush this step with inadequate equipment, as precision is paramount here. Investing in good quality tools will save you time and frustration in the long run.
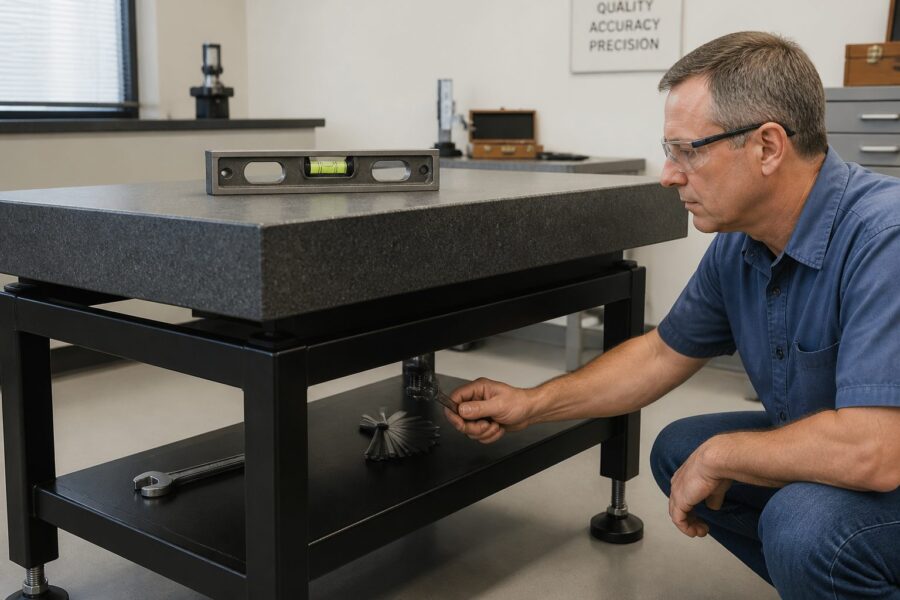
The most important tool you will need is a high-precision machinist’s level or an electronic level. These are far more sensitive than a standard carpenter’s level and can detect minute deviations from true horizontal. A level with a sensitivity of 0.0005 inches per 10 inches or better is generally recommended for metrology applications.
For making adjustments, you will need a set of open-end wrenches or an adjustable wrench that fits the leveling feet’s lock nuts and adjustment nuts. Sometimes, a socket set or hex keys are necessary depending on the specific design of your stand’s feet. Always use the correct size wrench to avoid stripping the nuts.
A supply of non-compressible shims, such as steel or plastic shims, can be incredibly useful for fine adjustments, especially if your floor is particularly uneven. These shims can be placed directly under the leveling feet to achieve precise height changes. Avoid using wooden shims, as they can compress or absorb moisture over time, leading to instability.
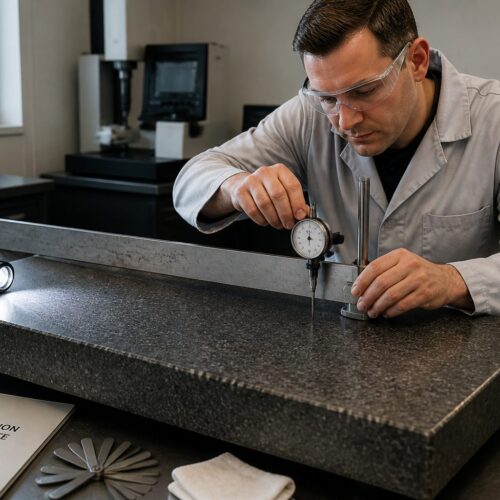
You should also have a sturdy straightedge or a precision ruler to check for rocking after initial adjustments. A flashlight can be helpful for peering under the plate and stand to ensure proper contact and identify any gaps. A marker or chalk can be useful for marking adjustment points or directions.
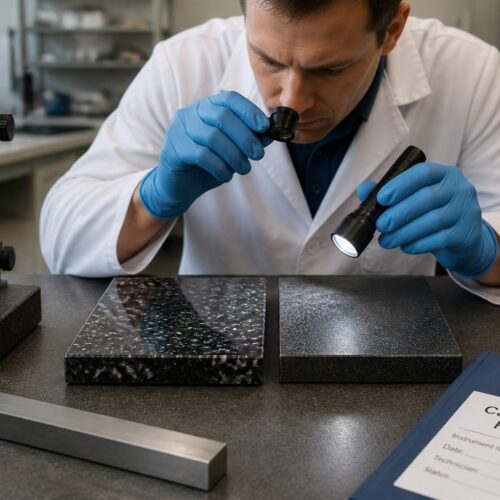
Finally, a clean cloth and some denatured alcohol or a suitable granite cleaner are essential for preparing the surface plate. A clean surface ensures your level makes proper contact and prevents debris from interfering with accurate readings. I always recommend having a small notebook and pen ready to document your adjustments.
Confirming Proper Support: Three-Point and Multi-Point Concepts
The stability of your granite surface plate depends entirely on how it is supported by its stand. Understanding the principles of three-point versus multi-point support is fundamental to proper surface plate leveling. Most manufacturers design their plates for specific support configurations to maintain flatness.
For most smaller and medium-sized surface plates, a three-point kinematic support system is the standard. This means the plate rests on three precisely located points on the stand, forming a stable tripod. This configuration inherently prevents rocking and ensures the plate’s weight is distributed without inducing twist or flex.
With a three-point support system, the three points are typically located at 20% in from each end along the longest dimension and one point centered on the opposite side. This specific placement minimizes deflection and allows the plate to settle naturally. It is a robust design that prevents over-constraining the granite.
Larger surface plates, particularly those over 48 inches in length, often require a multi-point support system, which might involve 5, 6, or even more support points. These additional points are necessary to distribute the much heavier weight evenly and prevent sagging across the larger span. Each point must share the load appropriately.
Regardless of the number of support points, the goal is always to ensure each point makes firm, even contact with the underside of the granite. Any gaps or uneven pressure can introduce stress into the plate, causing it to warp and lose its certified flatness. This is where precise stand adjustment becomes absolutely critical.
Before you even touch a wrench, identify the specific support points on your stand and confirm they align with the manufacturer’s recommendations for your plate. Incorrect support point placement or an uneven load can permanently damage the plate or, at the very least, make accurate measurements impossible. Always consult your plate’s documentation for guidance on how to level a granite surface plate stand correctly.
Step-by-Step Stand Leveling Procedure
Now that you understand the principles and have your tools ready, it is time to tackle the actual surface plate leveling process. This procedure requires patience and precision, so take your time and do not rush through any steps. A methodical approach ensures the best possible results for your stand adjustment.
Begin by placing your high-precision level on the center of the surface plate, aligned with one of the main axes (e.g., parallel to the longest edge). Adjust the leveling feet on the stand, typically starting with the foot closest to the lowest reading, to bring the plate close to level in that direction. Remember to loosen the lock nut before adjusting the foot and tighten it afterwards.
- Clean the surface plate thoroughly
- Place the precision level on the plate
- Adjust one axis to approximate level
- Rotate the level 90 degrees
- Adjust the second axis to approximate level
- Check for rocking at all four corners
- Fine-tune adjustments using small increments
- Re-check level across multiple points
- Tighten all lock nuts securely
- Verify final stability and level
After adjusting the first axis, rotate your level 90 degrees and place it across the second axis of the plate. Repeat the adjustment process for this direction, again bringing the plate close to level. You will likely find that adjusting one axis affects the other, so be prepared to iterate between the two directions.
Once you have achieved an approximate level in both main directions, begin making very small, incremental adjustments to each leveling foot. Place the level at various points across the surface plate, not just the center, to check for consistency. The goal is to get the bubble or electronic reading as close to perfect center as possible at every point.
After each adjustment, gently tap the plate to help it settle, then re-read your level. This process of adjust, tap, and re-read is critical for achieving optimal stability and accuracy. It takes time, but it is the only way to effectively how to level a granite surface plate stand for truly precise work.
Finally, once you are satisfied with the level, securely tighten all lock nuts on the leveling feet. Be careful not to over-tighten, which could introduce new stresses, but ensure they are snug enough to prevent any movement. Re-check the level one last time after tightening to confirm no changes occurred.
Checking for Rocking, Twist, and Frame Contact Issues
Achieving a perfectly level surface is only one part of the equation for a stable granite surface plate. You must also diligently check for any signs of rocking, twisting, or improper contact between the plate and the stand frame. These issues can completely undermine your surface plate leveling efforts, even if your level reads perfectly.
To check for rocking, gently press down on each corner and along the edges of the surface plate. The plate should feel absolutely solid, with no discernible movement or “give” under pressure. Any rocking indicates that one or more of the leveling feet are not making full, even contact with the floor or the plate is not properly seated on its support points.
Twist is a more subtle but equally damaging issue, where the plate is distorted along its diagonal axes. You can often detect twist by placing your precision level diagonally across the plate and observing the readings. Significant differences in level readings across diagonals compared to the main axes suggest a twist is present, requiring further stand adjustment.
Another critical check involves inspecting for any unintentional contact between the granite surface plate and the metal frame of the stand itself, outside of the designated support points. Use a thin feeler gauge or even a piece of paper to try and slide it between the plate and the frame at various locations. There should be a small gap everywhere except the support points.
Unintended contact points can act as additional, uncontrolled support points, leading to localized stresses and distortions in the granite. This negates the carefully designed three-point or multi-point support system. If you find such contact, you will need to adjust the stand or shim the plate until only the proper support points are bearing the load.
Addressing rocking, twist, and frame contact issues is just as important as getting the bubble centered in your level. These checks ensure the physical integrity of your setup, allowing the granite to maintain its inherent flatness and provide a truly reliable reference for your precision measurements. It is a vital step in maintaining accuracy.
Floor Problems: Dealing With Uneven Concrete and Settling
Even the most perfectly adjusted surface plate stand can run into problems if the floor underneath it is unstable or uneven. Concrete floors, especially in older buildings or those subjected to heavy loads, can settle, crack, or have significant variations in height. These floor issues directly impact your surface plate leveling efforts.
If you find yourself constantly re-leveling your surface plate, or if one corner always seems to be low, the floor is likely the culprit. An uneven floor makes it incredibly difficult to get all the stand’s leveling feet to make firm, stable contact. This can lead to persistent rocking and instability, no matter how much you adjust the stand.
For minor unevenness, using non-compressible shims directly under the stand’s feet can help. Place shims strategically to fill small gaps and ensure each foot is firmly supported. This is often a trial-and-error process, so be prepared to make several small adjustments and re-checks.
For more significant floor problems, you might need to consider a more permanent solution. This could involve grinding down high spots in the concrete or pouring a self-leveling compound to create a truly flat pad for the stand. These are more involved solutions but can be necessary for critical metrology setups.
Another consideration is the long-term settling of the building itself. Over time, floors can shift, requiring periodic re-leveling of your surface plate. This is especially true in areas with heavy machinery or significant temperature changes. A proactive approach to monitoring floor stability is always a good idea.
Ultimately, a stable floor is the unsung hero of precision metrology. Ignoring floor problems means you are fighting an uphill battle with every surface plate leveling attempt. Addressing these foundational issues directly contributes to the long-term accuracy and stability of your entire inspection workstation.
After Leveling: Letting the Setup Settle and Rechecking
Once you have meticulously completed the surface plate leveling process and secured all the lock nuts, your work is not quite finished. It is crucial to allow the entire setup to settle before performing any critical measurements. Granite, despite its hardness, can experience very slight internal stress adjustments after being moved or re-leveled.
Allow the surface plate and stand to sit undisturbed for at least 24 hours. For larger plates or in environments with significant temperature fluctuations, a longer settling period of 48 to 72 hours is even better. This waiting period allows the granite to acclimate to its new support configuration and the ambient temperature.
After the settling period, you must perform a comprehensive recheck of the level. Use your precision level to verify all the points you checked initially, including the center and along both axes. Pay close attention to any minor shifts that may have occurred as the plate settled onto its newly adjusted support points.
If you find any minor deviations, make small, precise stand adjustment corrections. Remember, these should be very subtle tweaks, not major overhauls. The goal is to fine-tune the existing level rather than starting from scratch, which would trigger another settling period.
This rechecking step is absolutely non-negotiable for critical applications. It confirms that the initial surface plate leveling holds true under static conditions after all stresses have equalized. Skipping this step can lead to measurements that are initially accurate but drift over time.
Think of it as the final verification of your hard work in how to level a granite surface plate stand. A settled and rechecked plate provides the highest confidence in your measurement capabilities. It is a small investment of time that pays off significantly in measurement reliability and reduced uncertainty.
How Often to Re-Level and What Triggers a Check
Maintaining the accuracy of your surface plate involves more than just an initial setup; regular re-leveling is a necessary part of its upkeep. The frequency of re-leveling depends on several factors, including the plate’s size, its environment, and the precision of the work it supports. There is no single answer for all situations.
As a general guideline, I recommend checking the level of a granite surface plate at least once a year, even in stable environments. For plates used in high-precision applications or those in dynamic environments, a quarterly or even monthly check might be more appropriate. Consistency in your checking schedule is important.
Certain events should always trigger an immediate re-leveling check, regardless of your schedule. If the surface plate or its stand has been moved, even slightly, you must perform a full surface plate leveling procedure. Any physical disturbance can compromise the stability you previously established.
Significant changes in the ambient temperature or humidity of the metrology lab can also warrant a re-check. Granite is thermally stable, but large swings can cause subtle expansion or contraction in the stand or the surrounding floor, affecting the level. Pay attention to your environmental controls.
Furthermore, if you notice any inconsistencies in your measurement results that cannot be attributed to the part or the measuring instrument, the surface plate’s level should be a primary suspect. Unexpected variations in readings are a strong indicator that a stand adjustment might be needed. Trust your instincts when something feels off.
Regular calibration of your surface plate by a certified technician is also a good opportunity to have the level checked and adjusted professionally. They have specialized equipment and expertise to ensure optimal performance. Proactive maintenance is always better than reacting to problems after they arise, especially when it comes to precision equipment.
Documenting Adjustments for Future Troubleshooting
Keeping a detailed record of your surface plate leveling adjustments is a practice that often gets overlooked, but it is incredibly valuable for long-term maintenance and troubleshooting. A good logbook can save you immense time and frustration down the line. I always stress the importance of documentation in any metrology setting.
Each time you perform a stand adjustment, record the date, the initial level readings, and the final level readings after adjustment. Note which leveling feet you adjusted and by approximately how much. This creates a history of your plate’s stability and helps identify recurring issues.
Include details about the tools used, such as the specific model of your precision level and its calibration status. Document any shims used, including their material and thickness, and where they were placed. These seemingly small details can be very important if you need to replicate a setup or diagnose a problem.
You should also record any environmental factors that might have influenced the need for re-leveling. For example, note if the plate was moved, if there was a recent change in temperature, or if heavy equipment was installed nearby. These observations provide context for why an adjustment was necessary.
A well-maintained log helps you understand the behavior of your specific surface plate and stand combination over time. It allows you to spot patterns, such as a particular corner consistently settling, which might indicate a deeper floor problem. This historical data is powerful for predictive maintenance.
This documentation acts as a reference guide for anyone else who might need to perform surface plate leveling in the future. It ensures consistency in the process and provides a clear audit trail of your metrology setup’s stability. Do not underestimate the power of a simple notebook for critical precision tasks.
Conclusion
Mastering how to level a granite surface plate stand is a fundamental skill for anyone involved in precision metrology. It is a critical step that directly impacts the accuracy and reliability of all measurements taken on your surface plate. Neglecting this crucial setup detail can lead to frustrating and costly errors in your work.
We have covered the essential differences between level and flat, explored various stand types, and outlined the specific tools required for the job. Understanding proper support points, whether three-point or multi-point, ensures the granite maintains its inherent flatness. This knowledge forms the backbone of stable metrology.
The step-by-step procedure, combined with diligent checks for rocking and twist, provides a comprehensive guide to achieving optimal stability. Addressing underlying floor problems and allowing adequate settling time reinforces the long-term integrity of your setup. These practical steps are often the difference between good and great measurements.
Remember that surface plate leveling is not a one-time task but an ongoing maintenance activity, especially after moves or environmental changes. Consistent re-checking and thorough documentation are your best allies in ensuring continued precision. These habits build confidence in your metrology results.
By following these guidelines, you are not just adjusting a stand; you are actively preserving the accuracy of your granite calibration standards. A properly leveled surface plate stand provides a stable, repeatable, and trustworthy foundation for all your critical inspection tasks. This commitment to detail elevates the quality of your entire operation.
Take the time to do it right, and your investment in a high-quality granite surface plate will continue to pay dividends in reliable data. Your metrology lab deserves this foundational precision. A little effort here goes a very long way.