
Finding an orange-brown smudge on your precision granite surface plate can be alarming, but don’t panic. This isn’t rust forming on the granite itself, which is largely inert. What you’re seeing is rust transfer, a common issue caused by ferrous metals left on the surface.
This discoloration happens when moisture reacts with steel or iron tools, creating rust particles that then deposit onto the micro-fine surface of the granite. Addressing this promptly and correctly is key to maintaining the integrity and accuracy of your valuable metrology equipment. We’ll show you how to tackle granite surface plate rust transfer removal safely and effectively.
Understanding the proper techniques for rust stain removal and implementing diligent corrosion prevention habits will keep your surface plate in pristine condition. Preventing future occurrences is just as important as cleaning up existing marks, ensuring your measurements remain precise. Proper tool storage near surface plate locations also plays a significant role in this ongoing battle.
What Rust Transfer Is and Why It Happens on Granite
Rust transfer occurs when oxidized metal particles from tools or workpieces are deposited onto the granite surface. Granite itself is a silicate rock, meaning it cannot rust, so the orange-brown marks are always external contaminants.
The process begins when ferrous metals, like steel gauges or cast iron parts, come into contact with moisture and oxygen. This chemical reaction produces iron oxides, commonly known as rust. These fine, abrasive particles then adhere to the granite’s microscopic peaks and valleys.
Even ambient humidity can be enough to kickstart this process, especially if tools are not properly cleaned or stored. Leaving a slightly damp steel rule on a surface plate overnight is a classic recipe for rust transfer. This often leads to frustrating rust stain removal tasks.
The porous nature of granite, though highly polished, means it has tiny spaces where these rust particles can settle. Over time, these transferred particles can become quite stubborn if not addressed promptly. This highlights the ongoing challenge of maintaining a clean metrology environment.
Neglecting these transferred rust spots can lead to more than just an unsightly surface. The abrasive nature of rust particles can compromise the flatness of the surface plate over time. This makes effective granite surface plate rust transfer removal a critical maintenance activity.
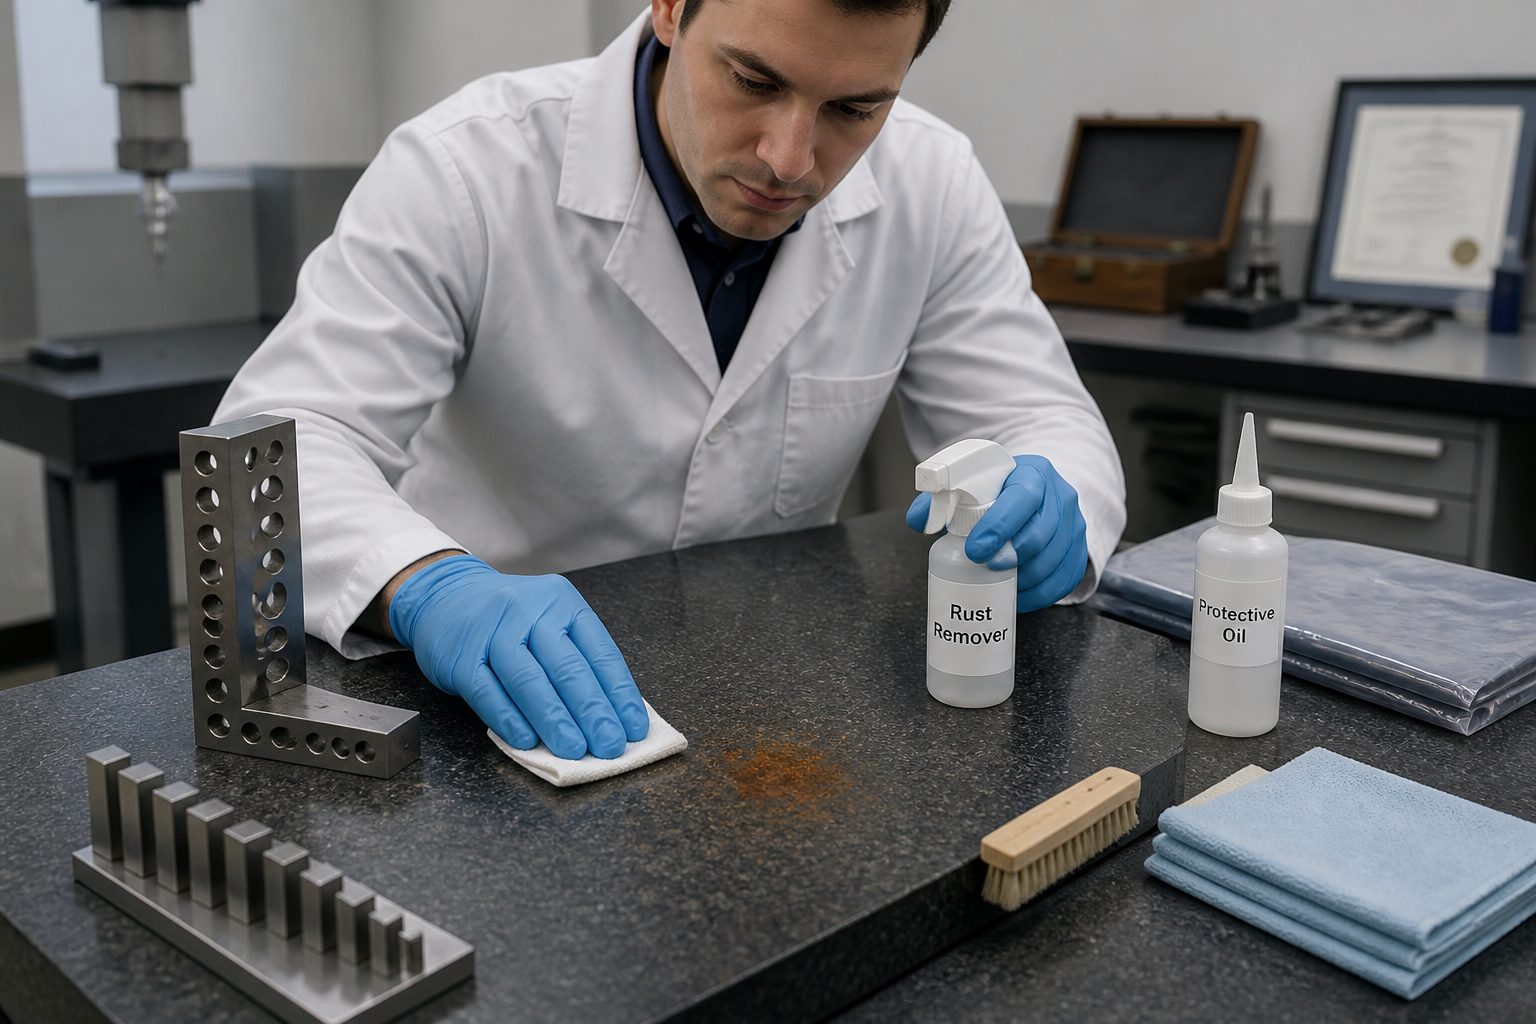
Understanding this mechanism is the first step toward effective prevention and cleaning strategies. We want to avoid these issues entirely through good corrosion prevention habits. Proper tool storage near surface plate areas is a key component of this approach.
Confirm It’s Transfer: Quick Checks Before You Clean
Before you reach for any cleaning agents, it’s important to confirm that the discoloration is indeed rust transfer and not something else. A simple visual inspection can usually tell you a lot about the nature of the mark. This helps you choose the right granite surface plate rust transfer removal method.
Rust transfer typically appears as an orange, reddish-brown, or yellowish smudge, often mirroring the shape of the tool that was left on the surface. Unlike a deep chemical stain, it usually sits on the surface or in the very shallow pores. Use the table below to quickly identify common surface plate issues.
| Characteristic | Likely Cause | Cleaning Approach |
|---|---|---|
| Orange/Reddish Smudge | Rust Transfer (from steel tools) | Mild acidic cleaner, careful scrubbing |
| Dark Grey/Black Mark | Graphite/Pencil, Rubbed Metal | Isopropyl alcohol, degreaser |
| White/Chalky Residue | Dried Coolant, Water Scale | Neutral cleaner, distilled water wipe |
| Green/Blue Spots | Copper/Brass Transfer, Oxidation | Mild acidic cleaner, specialized metal cleaner |
| Sticky Film | Grease, Oil, Adhesive Residue | Acetone or specific solvent |
Safe Removal for Light Rust Smears
Light rust smears, often fresh and superficial, can usually be removed with gentle methods. The goal is to lift the rust particles without damaging the granite’s precision surface. This approach minimizes the need for aggressive granite surface plate rust transfer removal.
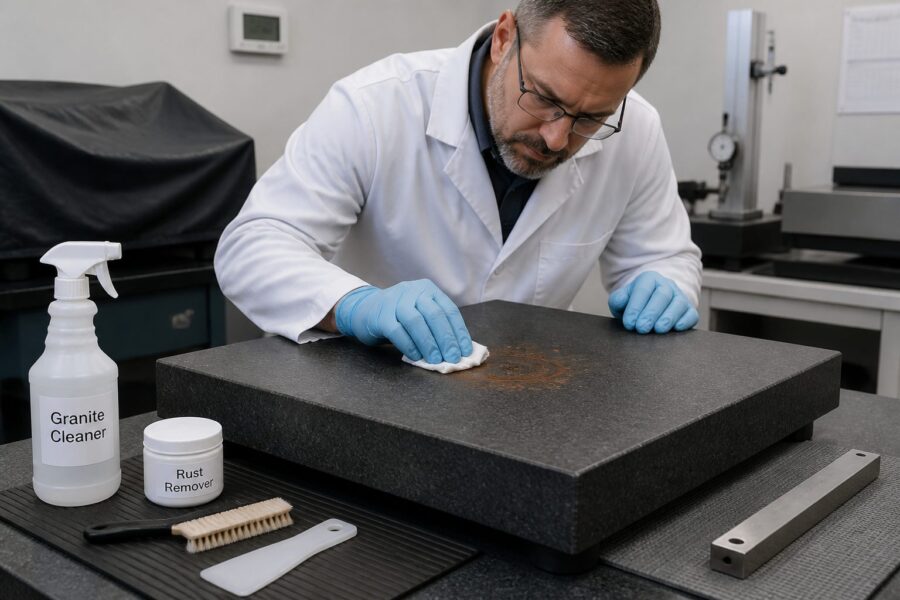
Start with a mild, dilute acidic cleaner, such as white vinegar or a weak citric acid solution. Apply a small amount to a clean, lint-free cloth or a cotton swab, then gently dab the affected area. Avoid saturating the granite.
Let the solution sit for only a minute or two; you don’t want it to dry on the surface. The mild acid helps to chemically loosen the iron oxide particles from the granite. This is a crucial step in effective rust stain removal.
After allowing it to work, gently wipe the area with a clean, damp cloth, using distilled water to neutralize any remaining acid. Then, immediately dry the area thoroughly with another clean, lint-free cloth. Always ensure no moisture lingers on the surface.
For slightly more stubborn light smears, you can try a paste made from baking soda and water. Apply this paste to the rust mark and gently rub with a soft cloth or a non-abrasive plastic scraper. The mild abrasive action, combined with the baking soda’s slight alkalinity, can help lift the rust.
Always work in small, controlled areas and check your progress frequently. Once the rust is gone, a final wipe with a neutral cleaner and then a dry cloth will prepare the surface for use. Following these simple steps will help maintain your surface plate’s accuracy and extend its lifespan, while reinforcing good corrosion prevention habits.
Removing Stubborn Rust Spots Without Abrasion
Stubborn rust spots require a bit more patience and a slightly stronger, but still non-abrasive, approach. The key is to dissolve the rust without affecting the delicate surface of the granite. Abrasive methods can permanently damage the plate’s flatness, making proper granite surface plate rust transfer removal essential.
Many specialized rust removers are available that are designed for stone or non-porous surfaces. Look for products specifically labeled as “rust stain remover for stone” or “iron stain remover,” and always check their compatibility with granite. These products often contain oxalic acid or other chelating agents that bind with iron particles.
Before applying any commercial product to your surface plate, test it on an inconspicuous area first. This helps ensure it won’t cause any discoloration or damage to the granite itself. You want to avoid any unintended consequences during your rust stain removal efforts.
Follow the product’s instructions carefully regarding application, dwell time, and rinsing. Typically, you’ll apply the solution, let it sit for the recommended period, and then thoroughly rinse and dry the area. Always use distilled water for rinsing to prevent mineral deposits.
For very deep-seated spots, a poultice method can be effective. This involves mixing a rust remover solution with an absorbent material, like diatomaceous earth or paper towels, to create a thick paste. This paste is then applied to the stain, covered with plastic wrap, and allowed to sit for several hours or even overnight.
The poultice draws the stain out of the granite as it dries. Once dry, carefully scrape away the poultice with a plastic scraper, then rinse thoroughly with distilled water and dry completely. This method is highly effective for deep rust stain removal without resorting to harsh scrubbing or abrasive materials.
Cleaning the Tool That Caused It (So It Doesn’t Come Back)
Removing rust from your granite surface plate is only half the battle; you must address the source of the rust. The tool that caused the transfer likely has active rust on its surface, which will simply re-deposit if not properly cleaned. This step is fundamental to preventing recurring granite surface plate rust transfer.
Inspect all tools regularly, especially those frequently used on the surface plate, for any signs of rust or corrosion. Even a tiny speck of rust can initiate a larger problem. Proactive cleaning is a cornerstone of good corrosion prevention habits.
For light rust on tools, use a fine abrasive pad (like a Scotch-Brite pad) or a brass brush with a penetrating oil. Gently scrub the rusted area until the rust is removed. Ensure you don’t remove any critical measuring surfaces or calibration marks.
For more severe tool rust, a chemical rust remover designed for metals can be used, following the product instructions carefully. After chemical treatment, always neutralize and thoroughly rinse the tool to prevent further corrosion. This ensures the tool is safe for future use.
Once the tool is clean, immediately apply a thin layer of rust-preventative oil or wax. This creates a barrier against moisture and oxygen, protecting the metal surface. Proper tool storage near surface plate areas should always include this protective coating.
Consider storing frequently used precision tools in individual protective sleeves or boxes with desiccant packs. This extra layer of protection goes a long way in maintaining their condition and preventing future rust transfer. Consistent attention to tool cleanliness and protection is an essential part of your metrology routine.
Dry Handling Habits: Gloves, wipes, and moisture control
Preventing rust transfer begins with meticulous handling habits, focusing heavily on moisture control. Even the smallest amount of moisture from hands or the environment can initiate corrosion on tools. Implementing strict dry handling protocols reduces the need for granite surface plate rust transfer removal.
Always wear clean, lint-free gloves when handling precision tools or workpieces that will come into contact with the surface plate. Fingerprints contain oils and moisture that can accelerate rust formation. These simple steps are vital for effective corrosion prevention habits.
- Wear clean, lint-free gloves consistently
- Wipe tools thoroughly before and after use
- Keep a dedicated dry cloth for the surface plate
- Control ambient humidity in the metrology lab
- Avoid breathing directly onto tools or the plate
- Never place damp items on the granite
- Use air dryers or desiccants if humidity is high
Tool Placement Rules: Keeping Steel Off Granite When Not Needed
Perhaps the simplest and most effective way to prevent granite surface plate rust transfer is to avoid direct contact between steel tools and the granite when they’re not actively in use. This rule seems obvious, but it’s often overlooked in busy workshops. Establishing strict tool placement rules is a cornerstone of good corrosion prevention habits.
Designate specific, non-granite resting areas for tools immediately adjacent to the surface plate. These could be wooden blocks, rubber mats, or specialized tool holders. This ensures tools are readily available without risking granite contamination.
Never leave steel gauges, parallels, angle plates, or workpieces directly on the granite surface for extended periods. Even a few minutes can be enough for rust to start transferring, especially in humid conditions. This is a common cause for needing granite surface plate rust transfer removal.
Implement a “clean as you go” policy where every tool is wiped down and placed back in its designated, protected spot immediately after use. This prevents accidental overnight contact with the granite. Diligent adherence to this practice significantly minimizes rust risks.
For workpieces that must remain on the plate for a while, ensure they are thoroughly cleaned, dried, and lightly oiled. You can also place a thin, non-abrasive barrier beneath them as an additional precaution. This proactive approach helps avoid rust stain removal later.
Educate everyone who uses the surface plate about these tool placement rules and the reasons behind them. A shared understanding of best practices is essential for collective success in maintaining precision equipment. Proper tool storage near surface plate areas is crucial for everyone to follow.
Using Protective Barriers Correctly (Without Adding Grit)
Protective barriers can be invaluable for preventing rust transfer, but they must be used correctly to avoid introducing other contaminants. The wrong barrier or improper use can actually do more harm than good to your precision surface plate. We want to avoid any situation that might necessitate granite surface plate rust transfer removal.
Always use barriers that are clean, dry, and non-abrasive. Materials like thin, clean plastic sheets, specialized surface plate covers, or even clean, lint-free paper towels can work. The key is to ensure they won’t scratch the granite or shed fibers.
Avoid using materials that can trap moisture, like certain types of fabric or thick cardboard, directly on the granite. These can create a micro-environment conducive to rust formation on tools placed on top. Good corrosion prevention habits dictate careful material selection.
When covering the entire surface plate for longer periods, ensure the cover allows for some air circulation to prevent moisture buildup. A full, heavy cover without ventilation can sometimes trap humidity, counteracting your efforts. This is especially true for extended periods of inactivity.
For temporary placement of tools or workpieces, a small, clean sheet of polyethylene film or a dedicated soft, non-metallic mat works well. Place this barrier between the metal object and the granite. This provides an immediate, effective shield against rust transfer.
Regularly inspect and clean your protective barriers. Dirty or gritty barriers can scratch the surface plate, and damp ones can promote rust. Maintaining the cleanliness of your barriers is just as important as maintaining the plate itself, minimizing the need for rust stain removal.
After-Removal Steps: Neutral wipe and surface check
Once you’ve successfully completed the granite surface plate rust transfer removal, your work isn’t quite finished. Proper after-removal steps are essential to ensure the granite is truly clean, neutral, and ready for accurate measurements. Skipping these steps can lead to further issues or compromised precision.
After using any cleaning agent, especially acidic ones, it’s absolutely crucial to perform a neutral wipe. This involves thoroughly wiping the cleaned area, and ideally the entire plate, with a clean cloth dampened with a neutral surface plate cleaner or distilled water. This neutralizes any residual chemicals.
Immediately after the neutral wipe, dry the surface plate completely using a fresh, lint-free cloth. Any lingering moisture can quickly lead to new rust transfer or water spots. Ensure the surface feels completely dry to the touch before proceeding.
Next, perform a visual inspection of the entire surface plate under good lighting. Look for any remaining traces of rust, streaks from the cleaning agent, or new smudges. You want to confirm the rust stain removal was complete and left no new marks.
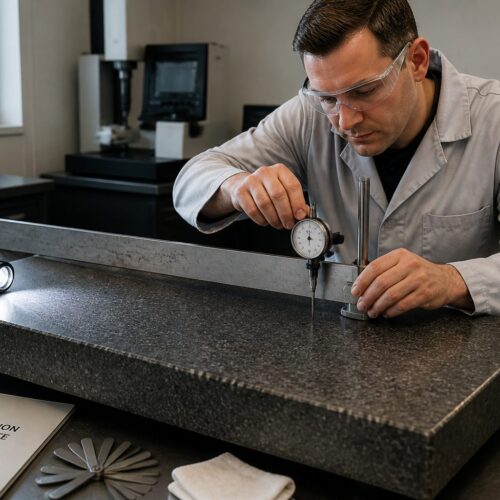
For critical applications, consider a flatness check with a repeat reading gauge or an autocollimator after cleaning. While cleaning typically doesn’t affect flatness, it’s good practice to verify, especially if you used a more aggressive cleaning method. This ensures the integrity of your metrology equipment.
Finally, apply a very light, even coating of surface plate cleaner/conditioner. This helps repel dust and provides a microscopic barrier against future contaminants. This final step reinforces good corrosion prevention habits and keeps your plate in top condition.
Long-Term Prevention Plan for Shared Work Areas
Shared work environments pose unique challenges for maintaining precision equipment like granite surface plates. A comprehensive, long-term prevention plan is essential to ensure everyone contributes to keeping the plate clean and accurate. This proactive approach minimizes the need for granite surface plate rust transfer removal.
Establish clear, written protocols for surface plate usage, cleaning, and tool storage. Post these guidelines prominently near the surface plate for easy reference. This removes ambiguity and sets expectations for all users.
Conduct regular training sessions for all personnel who use the surface plate. Emphasize the importance of proper handling, cleaning, and corrosion prevention habits. Reinforce that the surface plate is a shared, high-precision instrument requiring collective care.
Implement a system for proper tool storage near surface plate locations. This might include dedicated, clearly labeled storage cabinets or drawers for precision tools, complete with rust-preventative liners or desiccant packs. Discourage leaving any tools on the plate when not actively in use.
Schedule routine cleaning and inspection tasks for the surface plate and its immediate surroundings. Assign responsibility for these tasks to specific individuals or teams. This ensures consistent oversight and proactive maintenance.
Maintain proper environmental controls in the metrology lab, specifically focusing on temperature and humidity. Stable conditions significantly reduce the risk of condensation and rust formation on tools. Investing in dehumidifiers or climate control systems can pay dividends in equipment longevity and reduced rust stain removal efforts.
Conclusion
Rust transfer on a granite surface plate is a nuisance, but it’s entirely manageable with the right approach and consistent vigilance. Understanding that the granite itself isn’t rusting is the first step toward effective mitigation. This knowledge empowers you to perform proper granite surface plate rust transfer removal.
From gentle cleaning for light smears to more robust, non-abrasive methods for stubborn spots, you now have the techniques to restore your plate. Remember, the key is always to be gentle and avoid anything that could compromise the plate’s critical flatness. Your diligence protects an expensive piece of equipment.
Perhaps even more important than removal is prevention. Adopting rigorous corrosion prevention habits, such as wearing gloves and diligently wiping tools, will significantly reduce occurrences. These small actions make a big difference over time.
Implementing clear tool placement rules and ensuring proper tool storage near surface plate areas are non-negotiable for long-term maintenance. Every user must understand and follow these guidelines to protect the shared resource. This collective responsibility is crucial for any metrology lab.
Regular maintenance, combined with an understanding of why rust transfer happens, will keep your granite surface plate in peak condition for years to come. Your precision measurements depend on a perfectly clean and flat reference surface. Don’t let rust compromise your work.
By following these steps for rust stain removal and prevention, you ensure your metrology operations remain accurate and reliable. A well-maintained surface plate is a testament to a well-run quality control process. You’re safeguarding your investment and your measurement integrity.