Maintaining the accuracy of your granite surface plate is fundamental for precision manufacturing and quality control. These seemingly simple blocks of stone are the bedrock of metrology, providing a stable, flat reference plane for countless measurements. However, even the toughest granite needs regular attention to perform its best.
Professional calibration ensures your surface plate meets industry standards, guaranteeing that your measurements are trustworthy. Think of it like tuning a fine instrument; you wouldn’t perform without making sure it is ready. This preparation is a critical step in the overall process.
Getting your surface plate ready for calibration is more than just a quick wipe-down. It involves a series of specific steps designed to optimize conditions for the calibration technicians and secure the most accurate results possible. A thorough pre-calibration checklist not only saves time but also prevents potential issues during the service itself.
Why Pre-Calibration Preparation Matters for Accuracy
Proper preparation is not an optional extra; it directly impacts the precision of your calibration results. A dirty, unstable, or improperly conditioned surface plate can introduce errors that compromise the entire measurement process. This means your investment in calibration might not yield the true accuracy you expect.
Imagine a technician trying to measure minuscule deviations on a surface covered in dust or oil. Such contaminants create false high spots or low spots, leading to inaccurate readings. The calibration equipment itself can also be affected by these poor conditions.
Environmental factors also play a huge role in metrology. A surface plate that has not stabilized to room temperature can expand or contract, making accurate measurement impossible. This is why surface plate readiness extends beyond just physical cleanliness.
Failing to prepare adequately often leads to delays in the calibration service preparation. Technicians may need to spend valuable time cleaning or waiting for environmental conditions to stabilize, which can increase costs or require a rescheduled visit. These delays are easily avoidable with a bit of foresight.
Ultimately, your goal is to have a surface plate that you can trust completely for its flatness and dimensional stability. By committing to thorough preparing for surface plate calibration, you set the stage for optimal performance and reliable metrological outcomes. This commitment reflects positively on your entire quality assurance system.
Understanding Your Specific Calibration Requirements
Before any calibration service begins, you should clarify exactly what type of calibration your facility needs. Different applications and industry standards may require varying levels of accuracy and specific calibration procedures. Knowing these details beforehand helps both you and the technician.
For instance, an aerospace company might require a higher grade of calibration than a general manufacturing facility. This distinction influences the methods and equipment the calibration technician will use. Always consult your internal quality manual or relevant external standards like ISO 17025.
Communicate any specific concerns or past issues you have observed with your surface plate. Perhaps you have noticed a particular area that seems to be wearing down faster, or you have questions about its current flatness. Sharing this information can guide the technician’s focus.
Some facilities require an “as found” calibration report before any adjustments are made, followed by an “as left” report after corrections. This provides a clear record of the plate’s condition over time. Confirming these reporting needs is a key part of your calibration service preparation.
Ensure you understand the frequency required for calibration, which is typically based on usage, environmental conditions, and criticality of measurements. Sticking to a consistent schedule is far better than waiting until problems arise. This proactive approach supports ongoing accuracy in your operations.
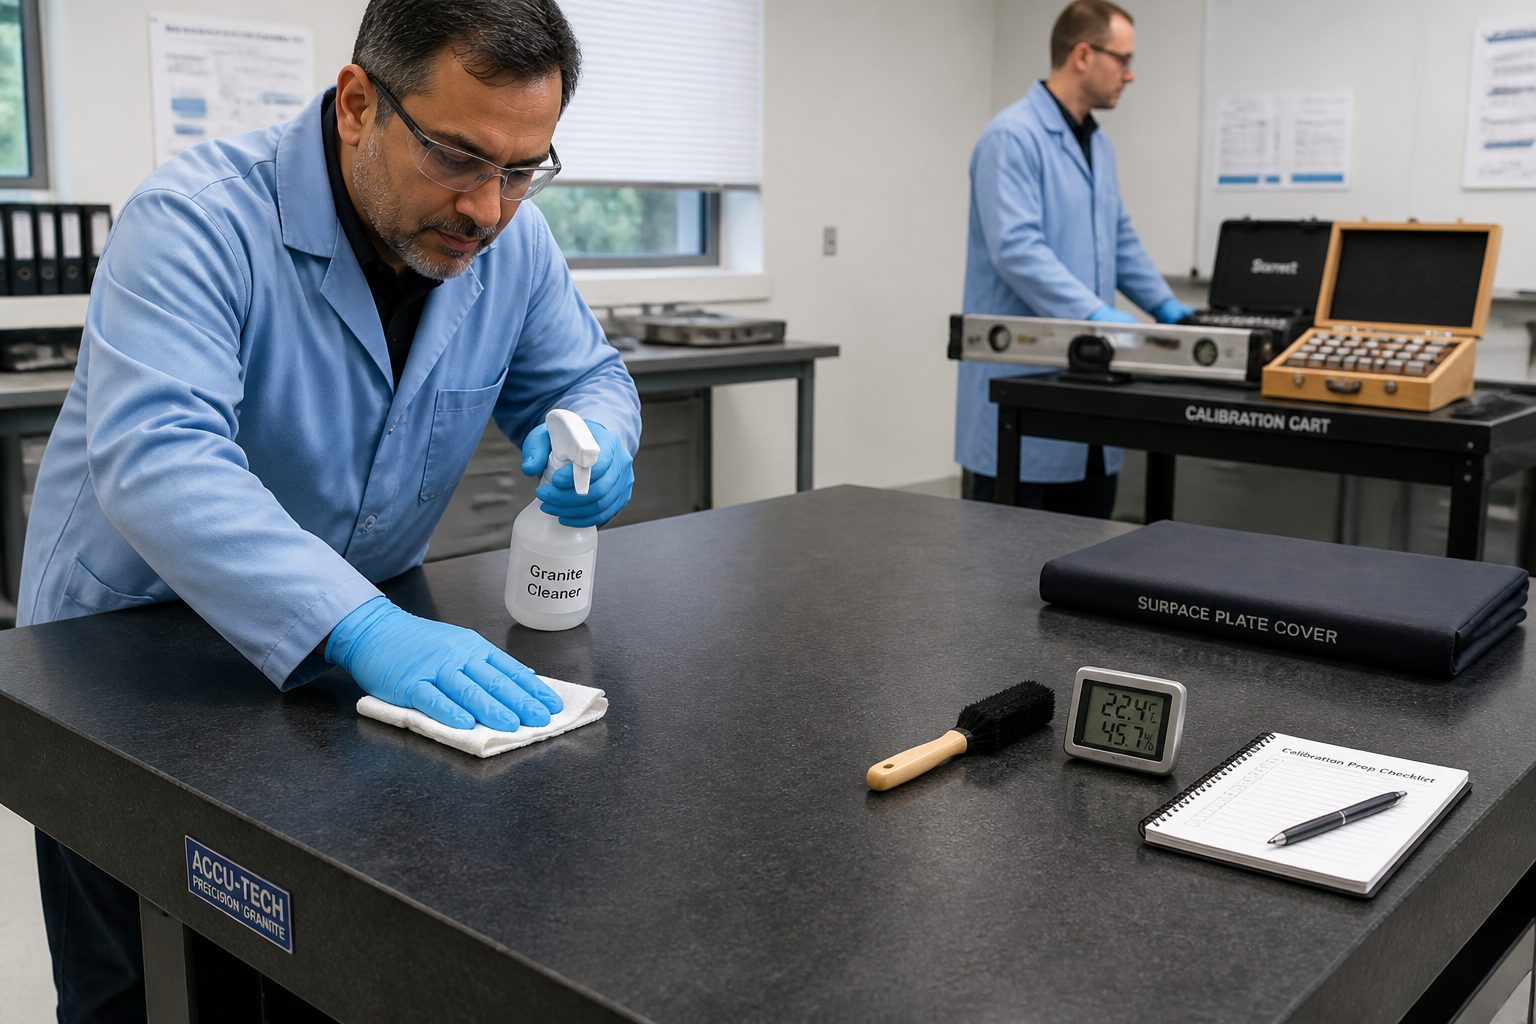
Essential Deep Cleaning Protocols Before Calibration Day
A truly clean surface plate is fundamental for accurate calibration readings. Dust, oil, grease, and even microscopic debris can accumulate over time, creating false high points that skew measurements. A thorough deep cleaning is non-negotiable for proper surface plate readiness.
Begin by removing all loose debris with a soft brush or a clean, lint-free cloth. Follow this with a specialized granite cleaner, ensuring it is non-abrasive and leaves no residue. Never use harsh chemicals or solvents that could damage the granite surface.
| Cleaning Step | Recommended Tool/Material | Reason for Importance |
|---|---|---|
| Initial Dust Removal | Soft-bristle brush, lint-free cloth | Removes loose particles that cause false readings |
| Surface Wipe-Down | Specialized granite cleaner, lint-free wipes | Dissolves oils, grease, and stubborn grime |
| Residue Removal | Denatured alcohol (sparingly), clean dry cloth | Ensures no film or streaks are left behind |
| Final Inspection | High-intensity light, magnifying glass | Checks for any missed spots or remaining contaminants |
| Edge Cleaning | Small brush, cotton swabs | Prevents debris from migrating onto the main surface |
Ensuring Environmental Stabilization: Temperature and Humidity
Granite, like all materials, expands and contracts with temperature fluctuations. For precision metrology, even minor changes can significantly impact the accuracy of your surface plate. Environmental stabilization is a critical part of preparing for surface plate calibration.
The ideal temperature for metrology is generally considered to be 68°F (20°C). Your surface plate and the surrounding environment should be maintained at this temperature for at least 24 hours prior to calibration. This allows the granite to reach thermal equilibrium.
Rapid temperature changes during calibration can cause the plate to “breathe,” leading to inconsistent readings. Ensure that air conditioning vents, heaters, or direct sunlight are not impacting the surface plate’s temperature. Stable conditions are paramount.
Humidity also plays a role, especially in preventing corrosion of the delicate calibration equipment. High humidity can lead to condensation and rust, while extremely low humidity can create static electricity issues. Maintain a relative humidity level between 40% and 60%.
If your surface plate is located near machinery that generates heat or vibration, consider relocating it or scheduling calibration during off-peak hours. Minimizing external influences creates the best possible environment for accurate measurements. This careful attention to detail ensures optimal calibration service preparation.
Clearing the Surface: Removing All Tools and Fixtures
This step might seem obvious, but it is often overlooked or rushed. Every single item on or around the surface plate must be removed before the calibration technician arrives. This includes gauges, fixtures, workpieces, and even cleaning supplies.
Leaving tools on the surface creates obstructions for the calibration equipment, making it impossible to take full measurements. It also introduces the risk of the technician accidentally bumping or dropping items. A clear surface is a safe and efficient surface.
Even small, seemingly insignificant items can affect the thermal stability of the plate. A metal block left on the surface can act as a heat sink or source, subtly altering the granite’s temperature in that localized area. Remember, precision means accounting for every variable.
Beyond the surface itself, clear the immediate surrounding area as well. Technicians need ample space to set up their equipment, which often includes large instruments like autocollimators and interferometers. Give them room to work comfortably and safely.
This step is a core component of surface plate readiness and ensures a smooth, uninterrupted calibration process. It tells the technician that you value their time and the accuracy of the service. A little effort here goes a long way in preparing for surface plate calibration.
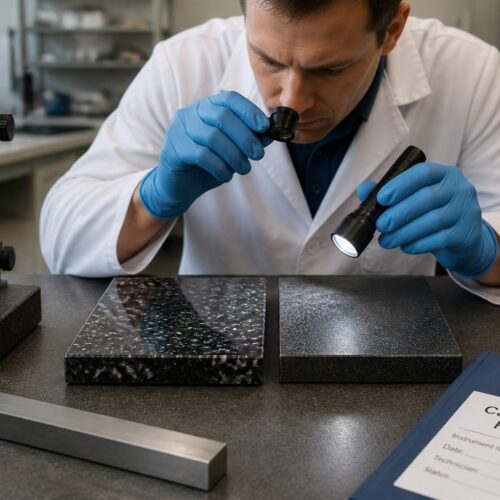
Conducting a Thorough Visual Inspection for Damage
Before the technician arrives, take a moment to perform your own detailed visual inspection of the granite surface plate. This pre-calibration checklist item can identify potential issues that need addressing or at least documenting. Look for any visible signs of wear or damage.
Pay close attention to the edges and corners, as these areas are often susceptible to chips and nicks. Even small imperfections can affect the stability of certain measurements. Documenting these findings helps manage expectations for the calibration results.
- Chips or cracks on the surface or edges
- Deep scratches or gouges
- Visible wear patterns, particularly in high-use areas
- Discoloration or staining that could indicate contamination
- Evidence of impact from dropped tools
- Dull spots where the surface might have been abraded
- Any signs of previous repairs or resurfacing
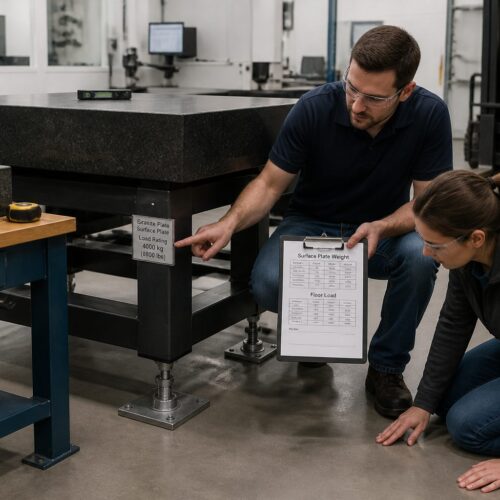
Verifying Proper Leveling and Stand Stability
A granite surface plate is only as stable as the stand it rests upon. Proper leveling and stand stability are fundamental for accurate measurements and are a crucial part of surface plate readiness. An unstable or uneven plate can lead to measurement errors, regardless of its inherent flatness.
Begin by checking the leveling feet of the stand; ensure they are all in firm contact with the floor. Any wobbling or rocking indicates instability that must be corrected. Use a high-quality machinist’s level to confirm the surface plate itself is level.
An unleveled plate can cause deflection, especially on larger or thinner plates, subtly distorting the surface. This deflection can introduce errors into your measurements and make precise calibration more challenging. Always strive for a perfectly level setup.
The stand itself should be robust and designed to support the significant weight of the granite. Flimsy or damaged stands can vibrate or sag over time, undermining the plate’s stability. Regularly inspect the stand for any signs of fatigue or wear.
Confirming proper leveling and stand stability is a simple yet effective step in preparing for surface plate calibration. It provides a solid foundation for the calibration process, ensuring that the results accurately reflect the plate’s true condition. This attention to underlying support is essential.
Documenting Any Current Issues or Observations
Before the calibration technician arrives, create a detailed log of any existing issues, observations, or concerns you have regarding your surface plate. This pre-calibration checklist item provides valuable context for the technician and helps track the plate’s history. A good record is a powerful tool.
Include details about specific wear patterns, areas where tools are frequently used, or any suspected inaccuracies you have noticed during your own operations. This information can help the technician focus their inspection and identify potential problem areas. Be as specific as possible in your descriptions.
Referencing previous calibration reports is also incredibly helpful. Note down the dates of the last calibration, the grade achieved, and any repairs or adjustments that were made. This historical data provides a baseline for evaluating the current condition.
If you have conducted any in-house checks or performed any minor maintenance on the plate, document these actions as well. Even small interventions can be relevant to the overall assessment of the surface plate. Transparency is key here.
Sharing this documentation during your calibration service preparation fosters a more informed and efficient process. It allows the technician to understand the plate’s operational context and address specific points of concern. This collaborative approach leads to better outcomes.
Communicating Effectively with Your Calibration Technician
Open and clear communication with your calibration technician is one of the most important aspects of successful calibration service preparation. They are the experts, and providing them with all necessary information ensures they can perform their job efficiently and accurately. Do not hesitate to ask questions or share insights.
Before their arrival, confirm the scheduled date and time, and ensure someone knowledgeable about the surface plate will be available. This person should be able to answer any questions the technician might have about the plate’s history or usage. A direct point of contact is invaluable.
Share your pre-calibration checklist and any documentation of issues you have compiled. This gives the technician a head start and helps them plan their work. They will appreciate your thoroughness and preparation.
Discuss any specific environmental conditions they should be aware of, such as ambient temperature fluctuations or potential sources of vibration. Providing this context helps them interpret their measurements correctly. Environmental factors are always a concern in metrology.
Ask about the expected duration of the calibration process and any requirements for power or workspace. This communication helps minimize disruptions to your operations and ensures the technician has everything they need. Good communication makes preparing for surface plate calibration much smoother.
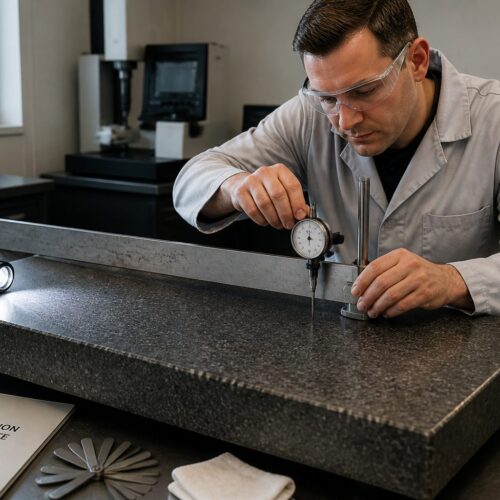
What to Expect During the On-Site Calibration Process
Understanding what happens during the actual calibration can help you better appreciate the importance of your preparation. The technician will typically use highly sensitive optical instruments to measure the flatness of your granite surface plate. This process is precise and methodical.
They will set up specialized equipment, such as an autocollimator or electronic levels, which project a beam of light or use sensitive sensors across the surface. These instruments detect minute variations in the plate’s flatness. The setup alone can take some time.
The technician will take readings at numerous points across the entire surface, often following a grid pattern. These readings are then mathematically processed to generate a comprehensive flatness report. This report details the overall deviation from a perfect plane.
If the surface plate is found to be out of tolerance, the technician may perform on-site lapping or resurfacing. This involves carefully grinding down the high spots to restore the plate’s flatness. Resurfacing is a skilled task that requires specialized tools and expertise.
After any adjustments, a final calibration is performed to verify the plate now meets the required specifications. You will receive a calibration certificate detailing the “as found” and “as left” conditions, along with the equipment used and the standards referenced. This documentation is essential for your quality system.
Post-Calibration Best Practices for Maintaining Accuracy
Receiving your freshly calibrated surface plate is not the end of the accuracy story; it is just the beginning of a new cycle. Implementing best practices after calibration is essential for preserving its flatness and ensuring long-term reliability. Your ongoing efforts directly impact the plate’s lifespan and performance.
Establish a regular cleaning routine using only approved granite cleaners and lint-free cloths. Daily cleaning prevents the buildup of contaminants that can wear down the surface or create false readings. Consistency here is key to maintaining surface plate readiness.
Always use a protective cover when the surface plate is not in use. This simple step shields the delicate surface from dust, debris, and accidental damage. A good cover is an inexpensive but effective safeguard.
Train all personnel who use the surface plate on proper handling techniques for tools and workpieces. Avoid dropping items or sliding heavy objects across the surface, as this can cause chips or wear. Respect for the equipment translates to sustained accuracy.
Continue monitoring the environmental conditions, especially temperature and humidity, in the area surrounding the surface plate. Consistent conditions minimize thermal expansion and contraction, which are major culprits of measurement drift. Environmental control is an ongoing commitment.
Conclusion
Preparing for surface plate calibration is a multifaceted process that significantly impacts the accuracy and reliability of your metrology operations. It involves meticulous cleaning, environmental control, thorough inspection, and clear communication. Every step contributes to a successful outcome.
By following a comprehensive pre-calibration checklist, you empower calibration technicians to deliver the most precise service possible. This proactive approach minimizes delays and ensures that your valuable granite surface plate performs at its peak. Your attention to detail directly translates into trusted measurements.
A well-prepared surface plate not only yields accurate calibration results but also extends the life of the plate itself. Regular maintenance and careful handling are just as important as the professional calibration service preparation. It is a continuous cycle of care.
Investing time and effort in surface plate readiness is an investment in the overall quality of your products and processes. It demonstrates a commitment to precision that resonates throughout your entire manufacturing workflow. This commitment builds confidence in your output.
Embrace these preparation steps as an integral part of your quality assurance program. Doing so ensures your granite calibration standards remain reliable reference points for years to come. Trust in your measurements starts with solid preparation.